Suspect Photography

words and images from david george brommer

Tag: b&w

Reinvigorate with Drone Photography and Fly Like an Eagle

Lago Trasimeno, Italy.

I purchased my first drone in 2018, the original DJI Mavic Air in red. I had a co-worker at B&H show me the ropes and then took the drone to Italy. For the first few flights my hands were shaking like a hound dog passing peach pits! It was truly exciting to take a camera into the sky and then apply years of early video game training to fly it over a mile away- so far that I quickly would lose sight of the little red drone.

Castello di Montecchio Vesponi, Italy
Small Castle and Olive Grove above Punta Bella, Italy

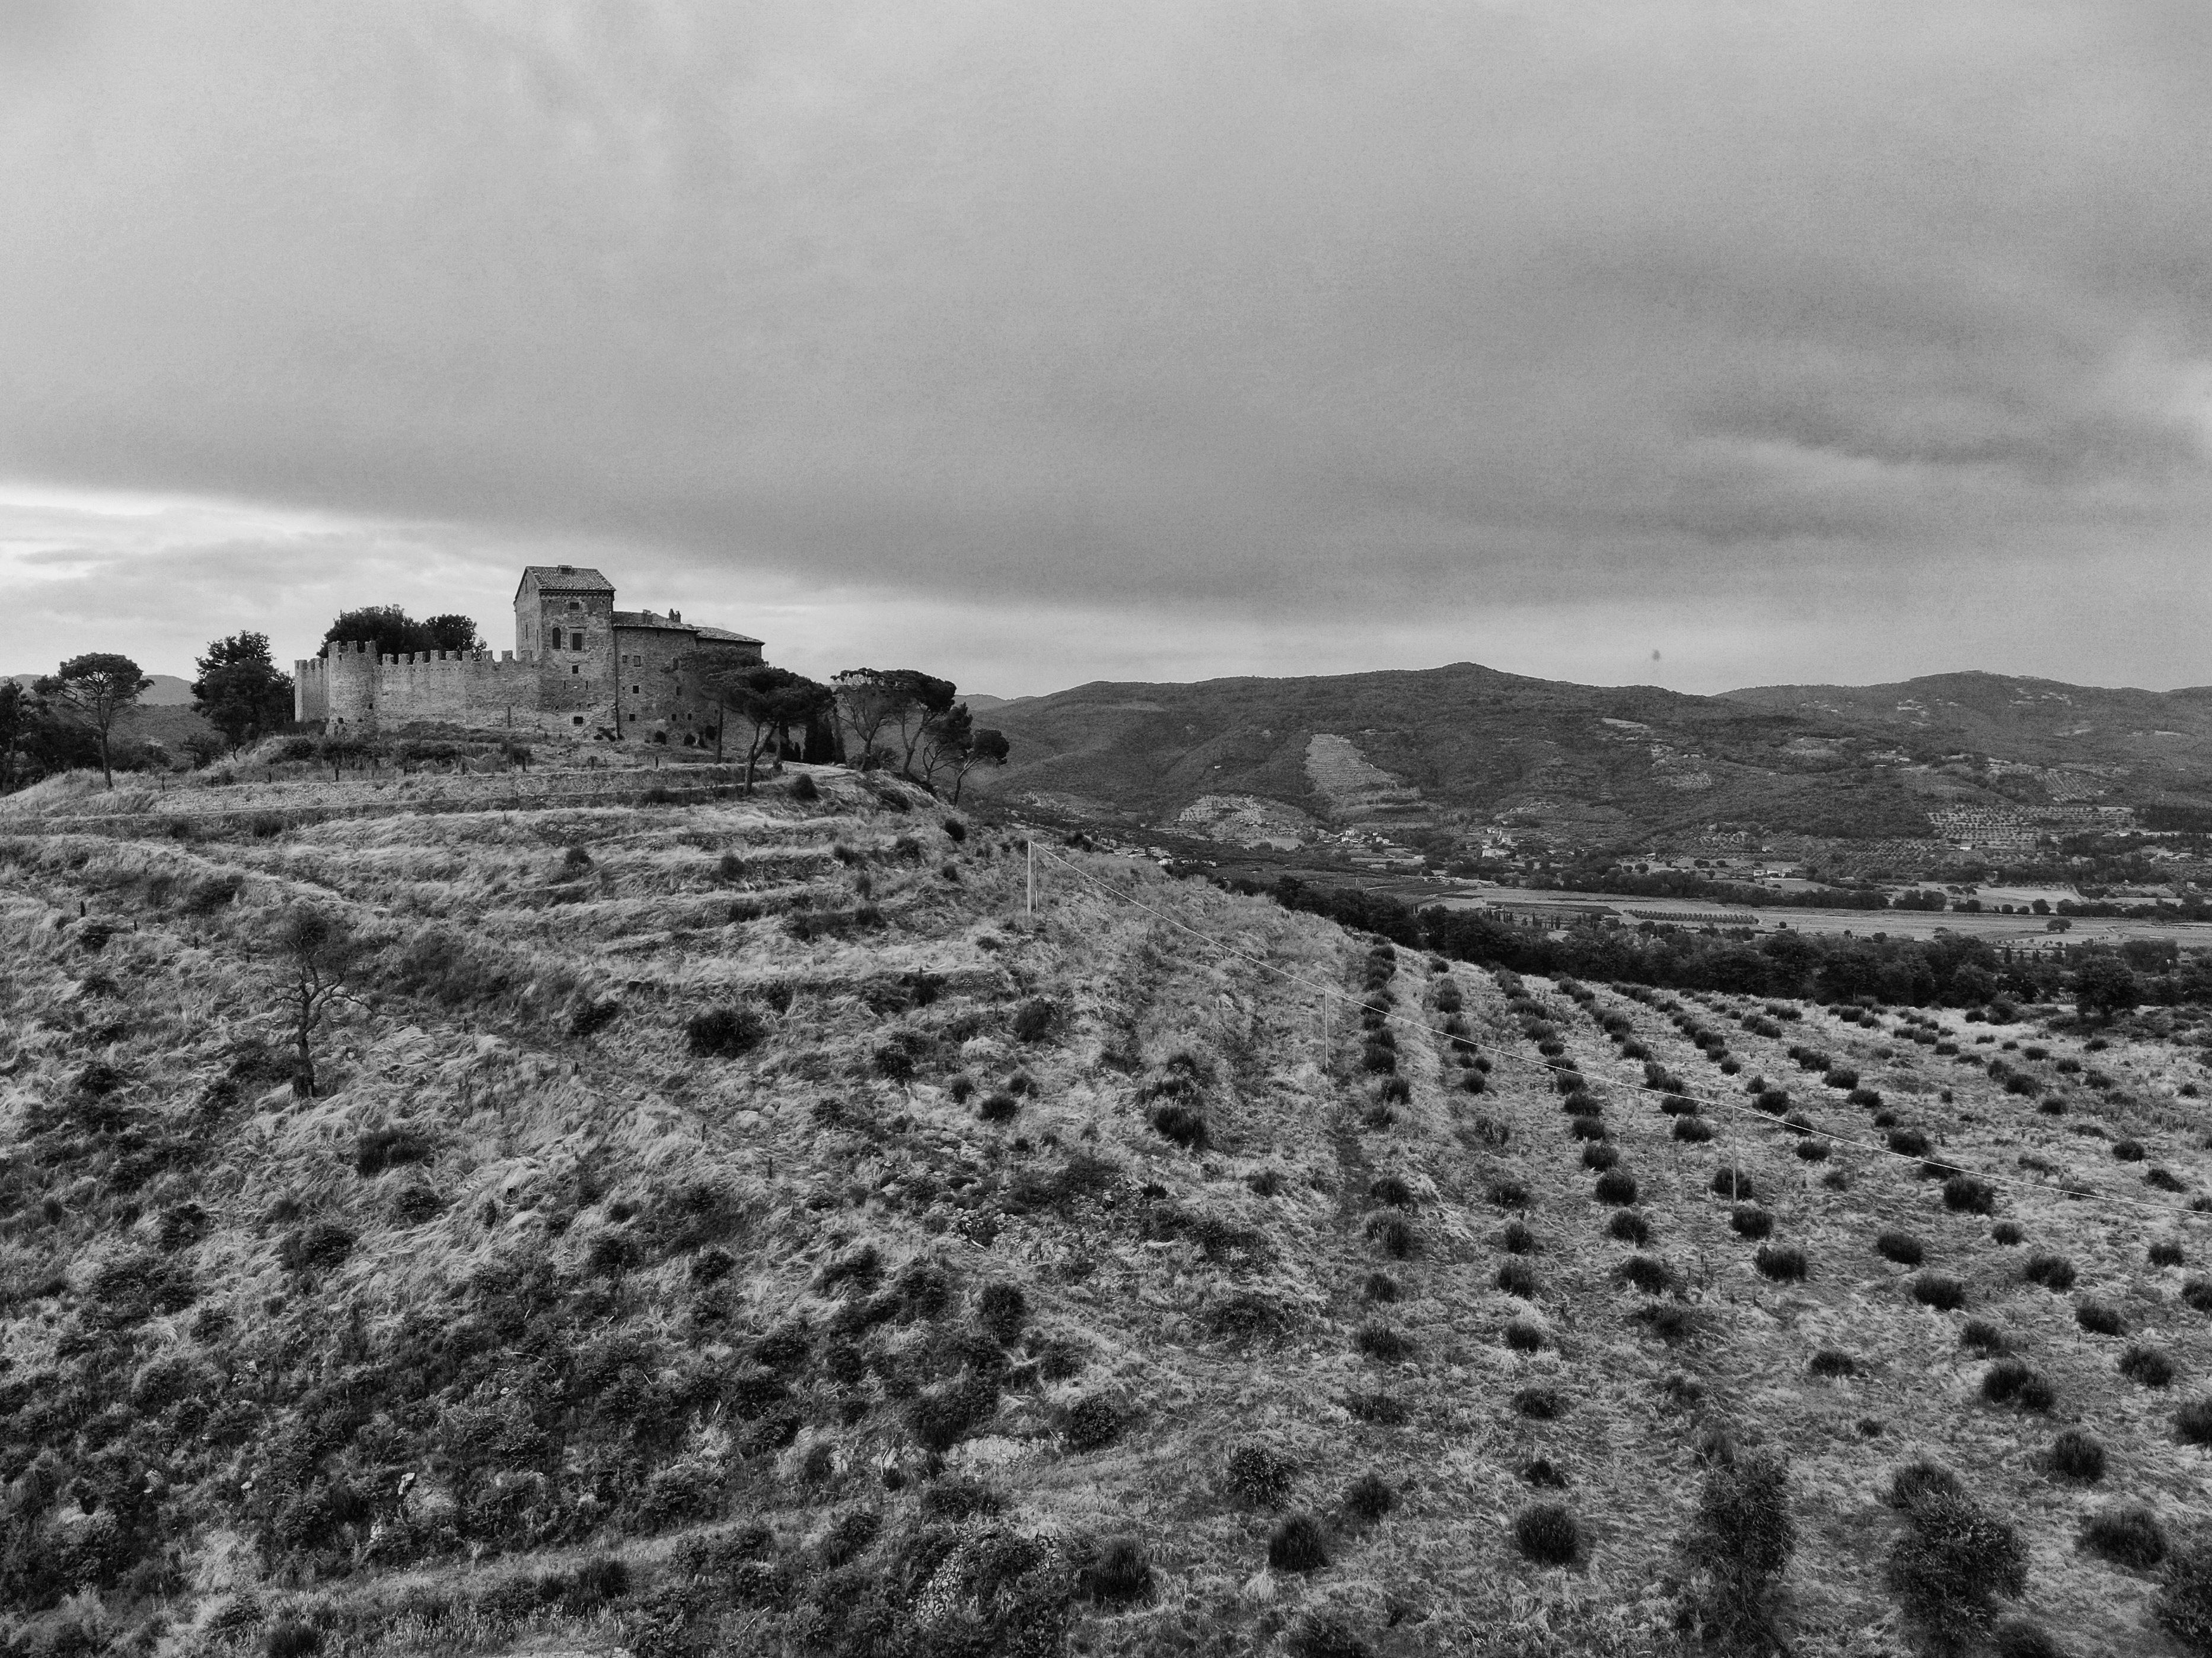
Aside from fear of crashing I was dumbfounded by the choice of either video or still. When I started droning I leaned heavily into video and even upped my Adobe account to include Premier. I put together a Tuscan countryside video that was quite basic and filled with mistakes. However among those mistakes were gold- I was learning to see like an eagle if not fly like one.

The End- Montauk Light House, NY

Drones can see straight ahead and at any angle completely down. It was the “completely down” that blew me away. Drones are smart, in that they know where they are in space (thank you GPS satellites). They can hover and remain stationary or they can fly upwards of 40 MPH in “sport mode”. What I found most appealing from a photographic perspective is hovering in cinema mode. Cine mode makes the drone move very slowly, like a slow camera pan. In still photography it allows for precise micro adjustments of the composition.

South End of Manhattan with Staten Island Ferry, NYC 2020

So get this, you are controlling a camera in the sky (400 foot ceiling as per FAA) over a mile away and making slight adjustments for framing while using altitude as your zoom. That is very exhilarating and empowering. You are now not limited to the perspective afforded by being grounded. Technology is wonderful!

Hay Rolls in a Tuscan Field
By lowering altitude you can “zoom” in a on detail or rotate to alter the entire composition.

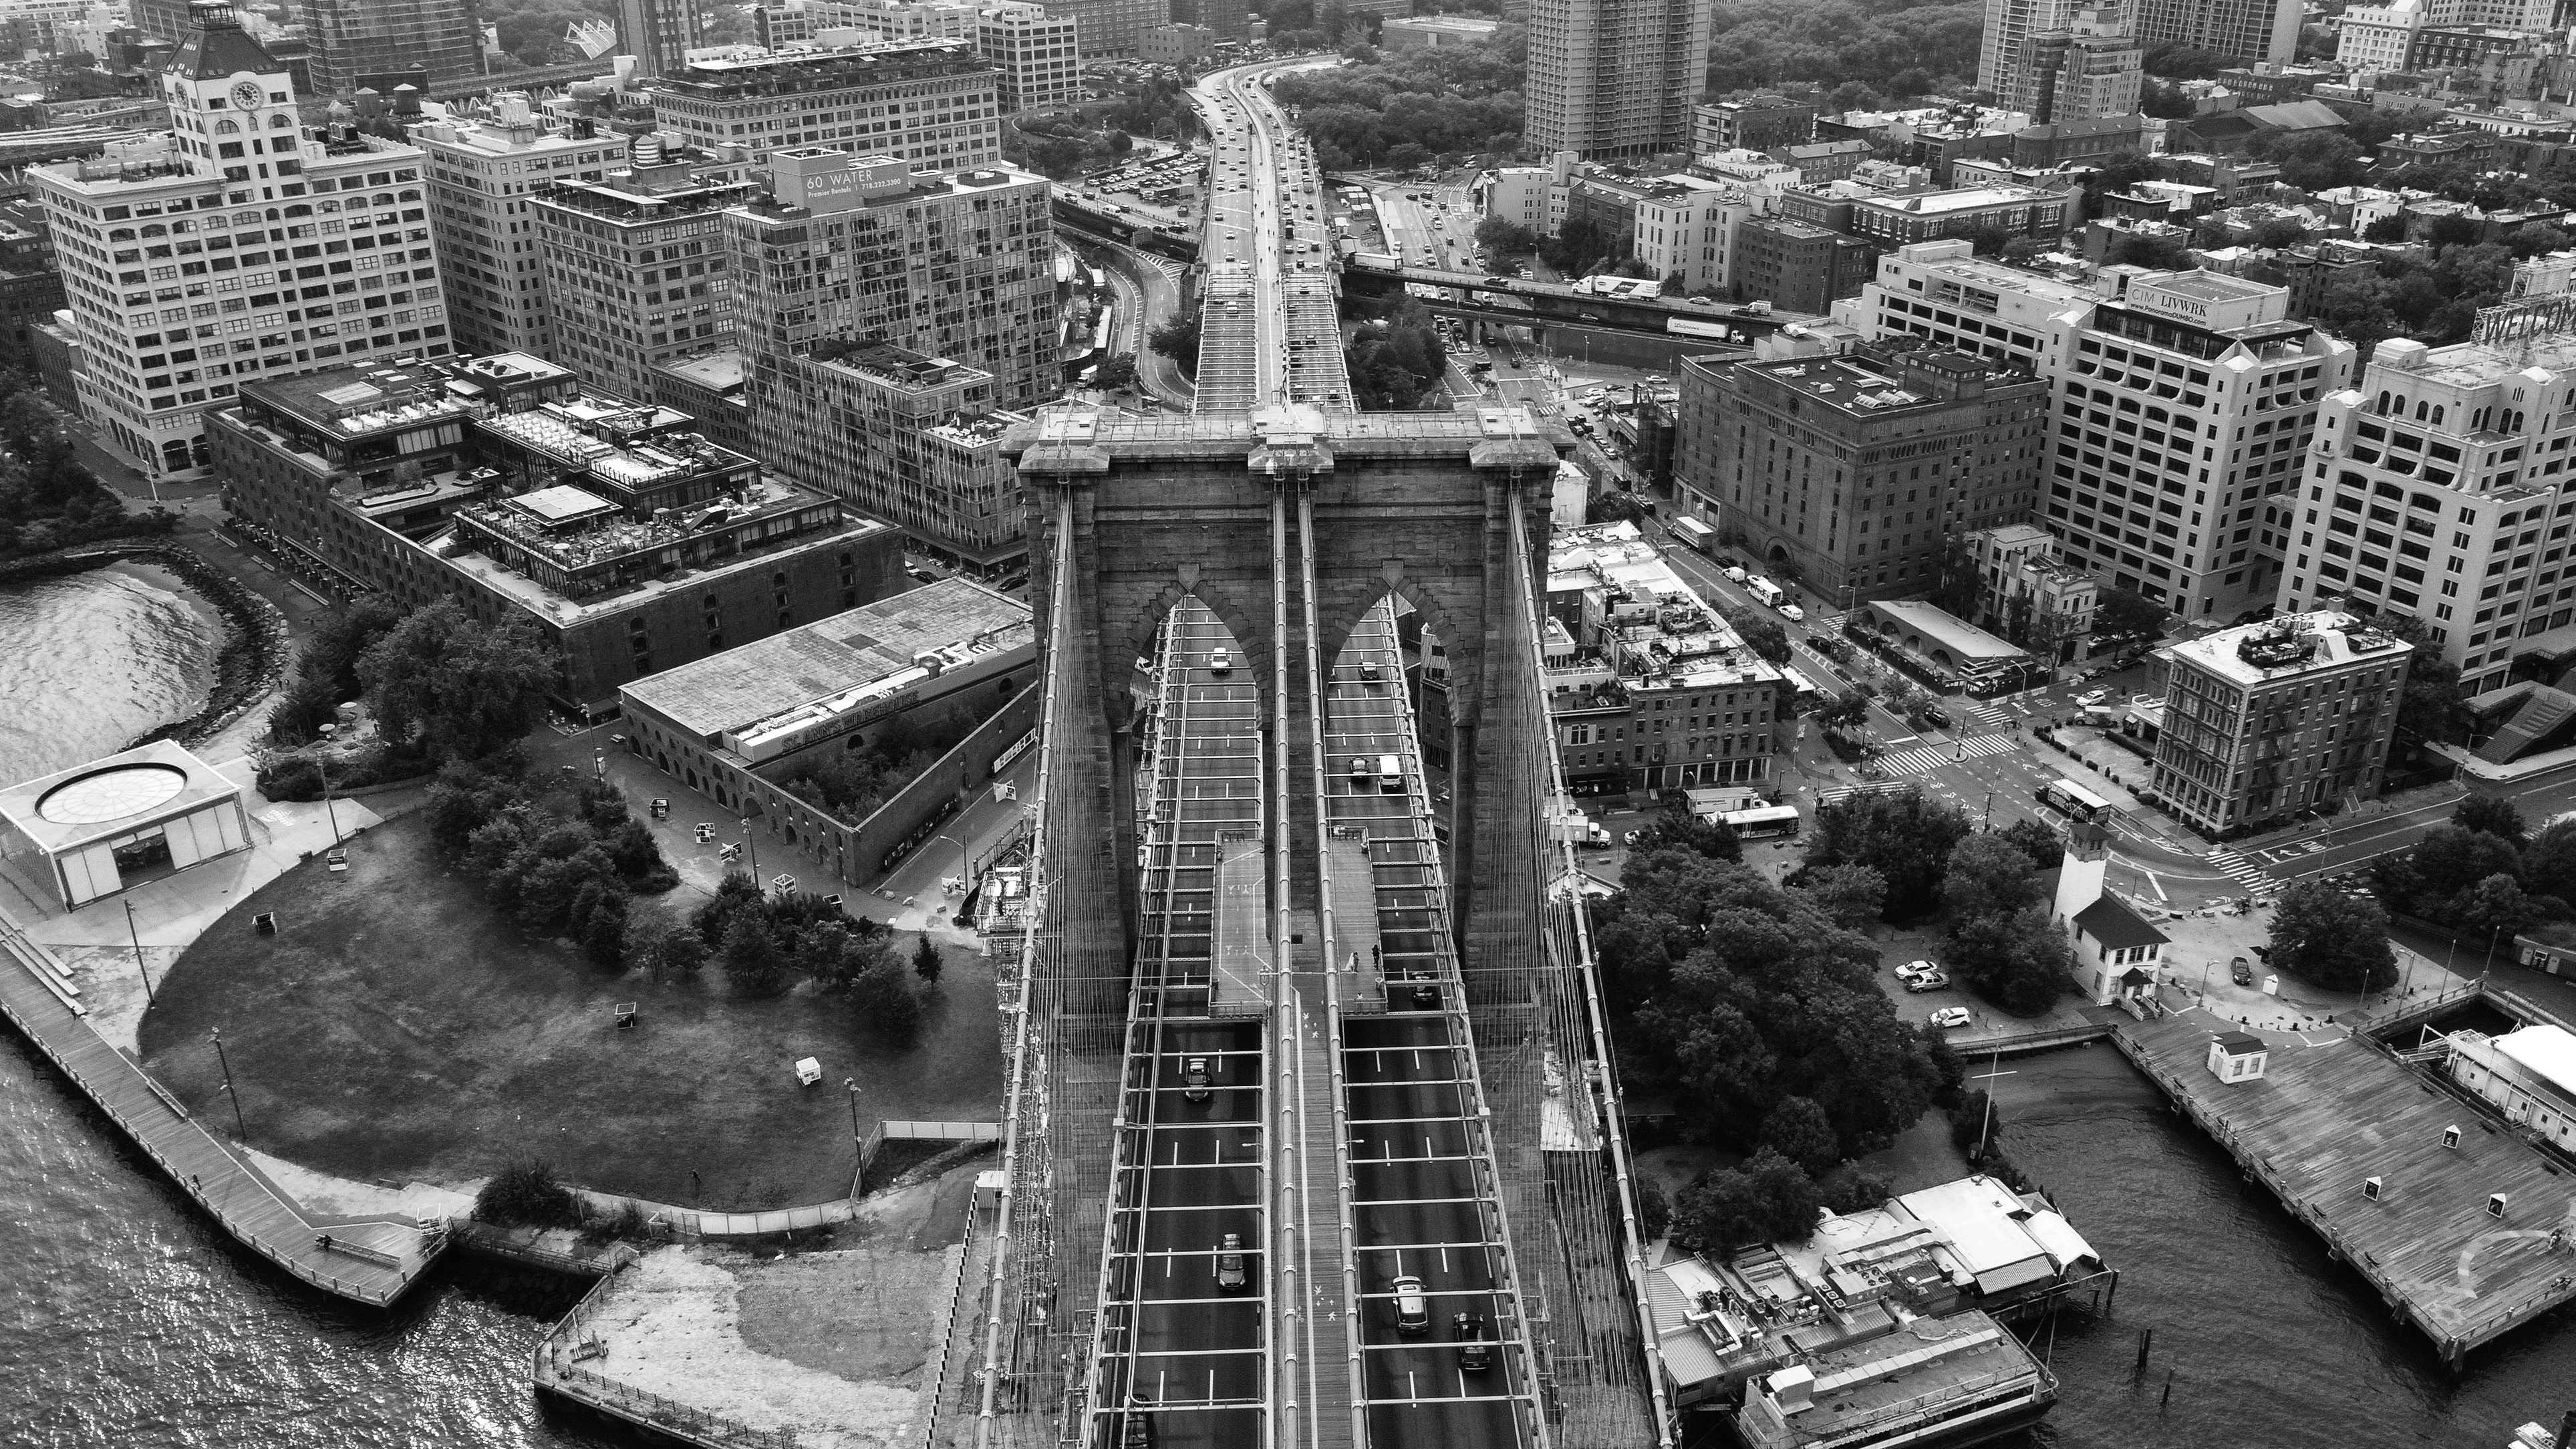
During the pandemic I bought the DJI Mavic Mini and used it on the quiet streets of Manhattan to document the amazing city. The Mini is under 50 grams and no licenses are needed to fly it, so it was perfect for my urban explorations.

Brooklyn Bridge Morning, NYC 2020
Brooklyn Bridge view towards Brooklyn (note the low covid traffic), NYC 2020

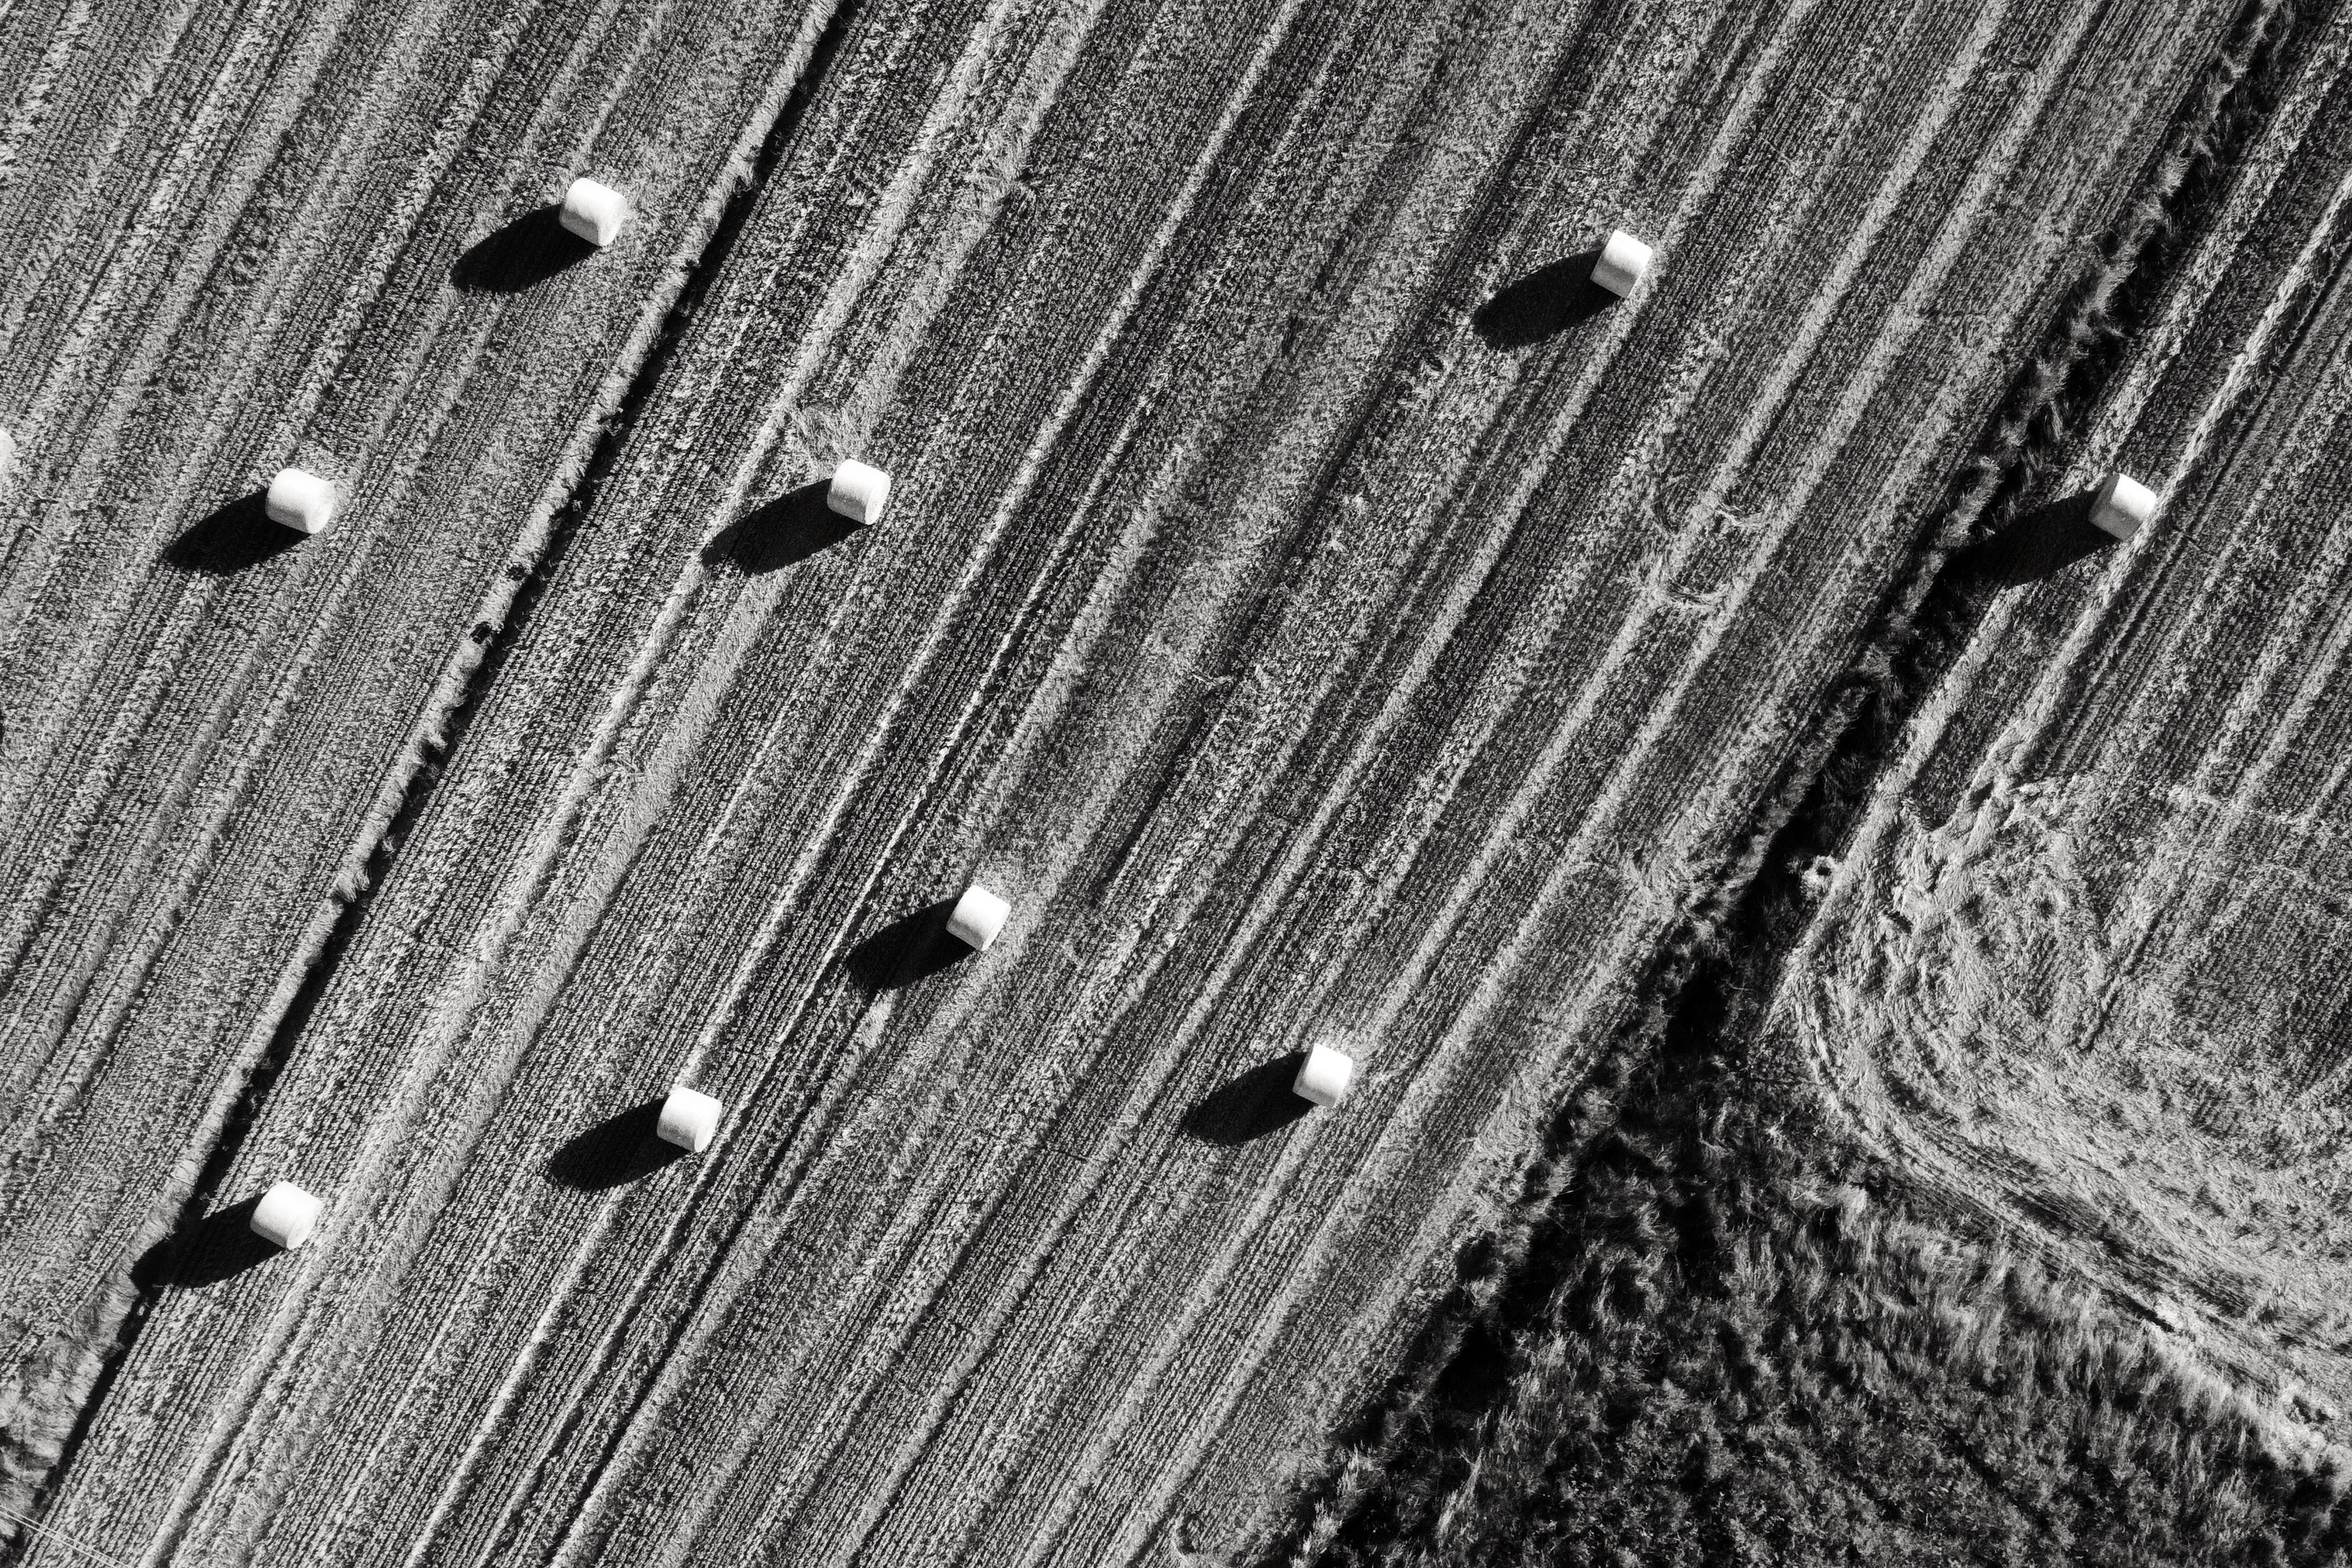
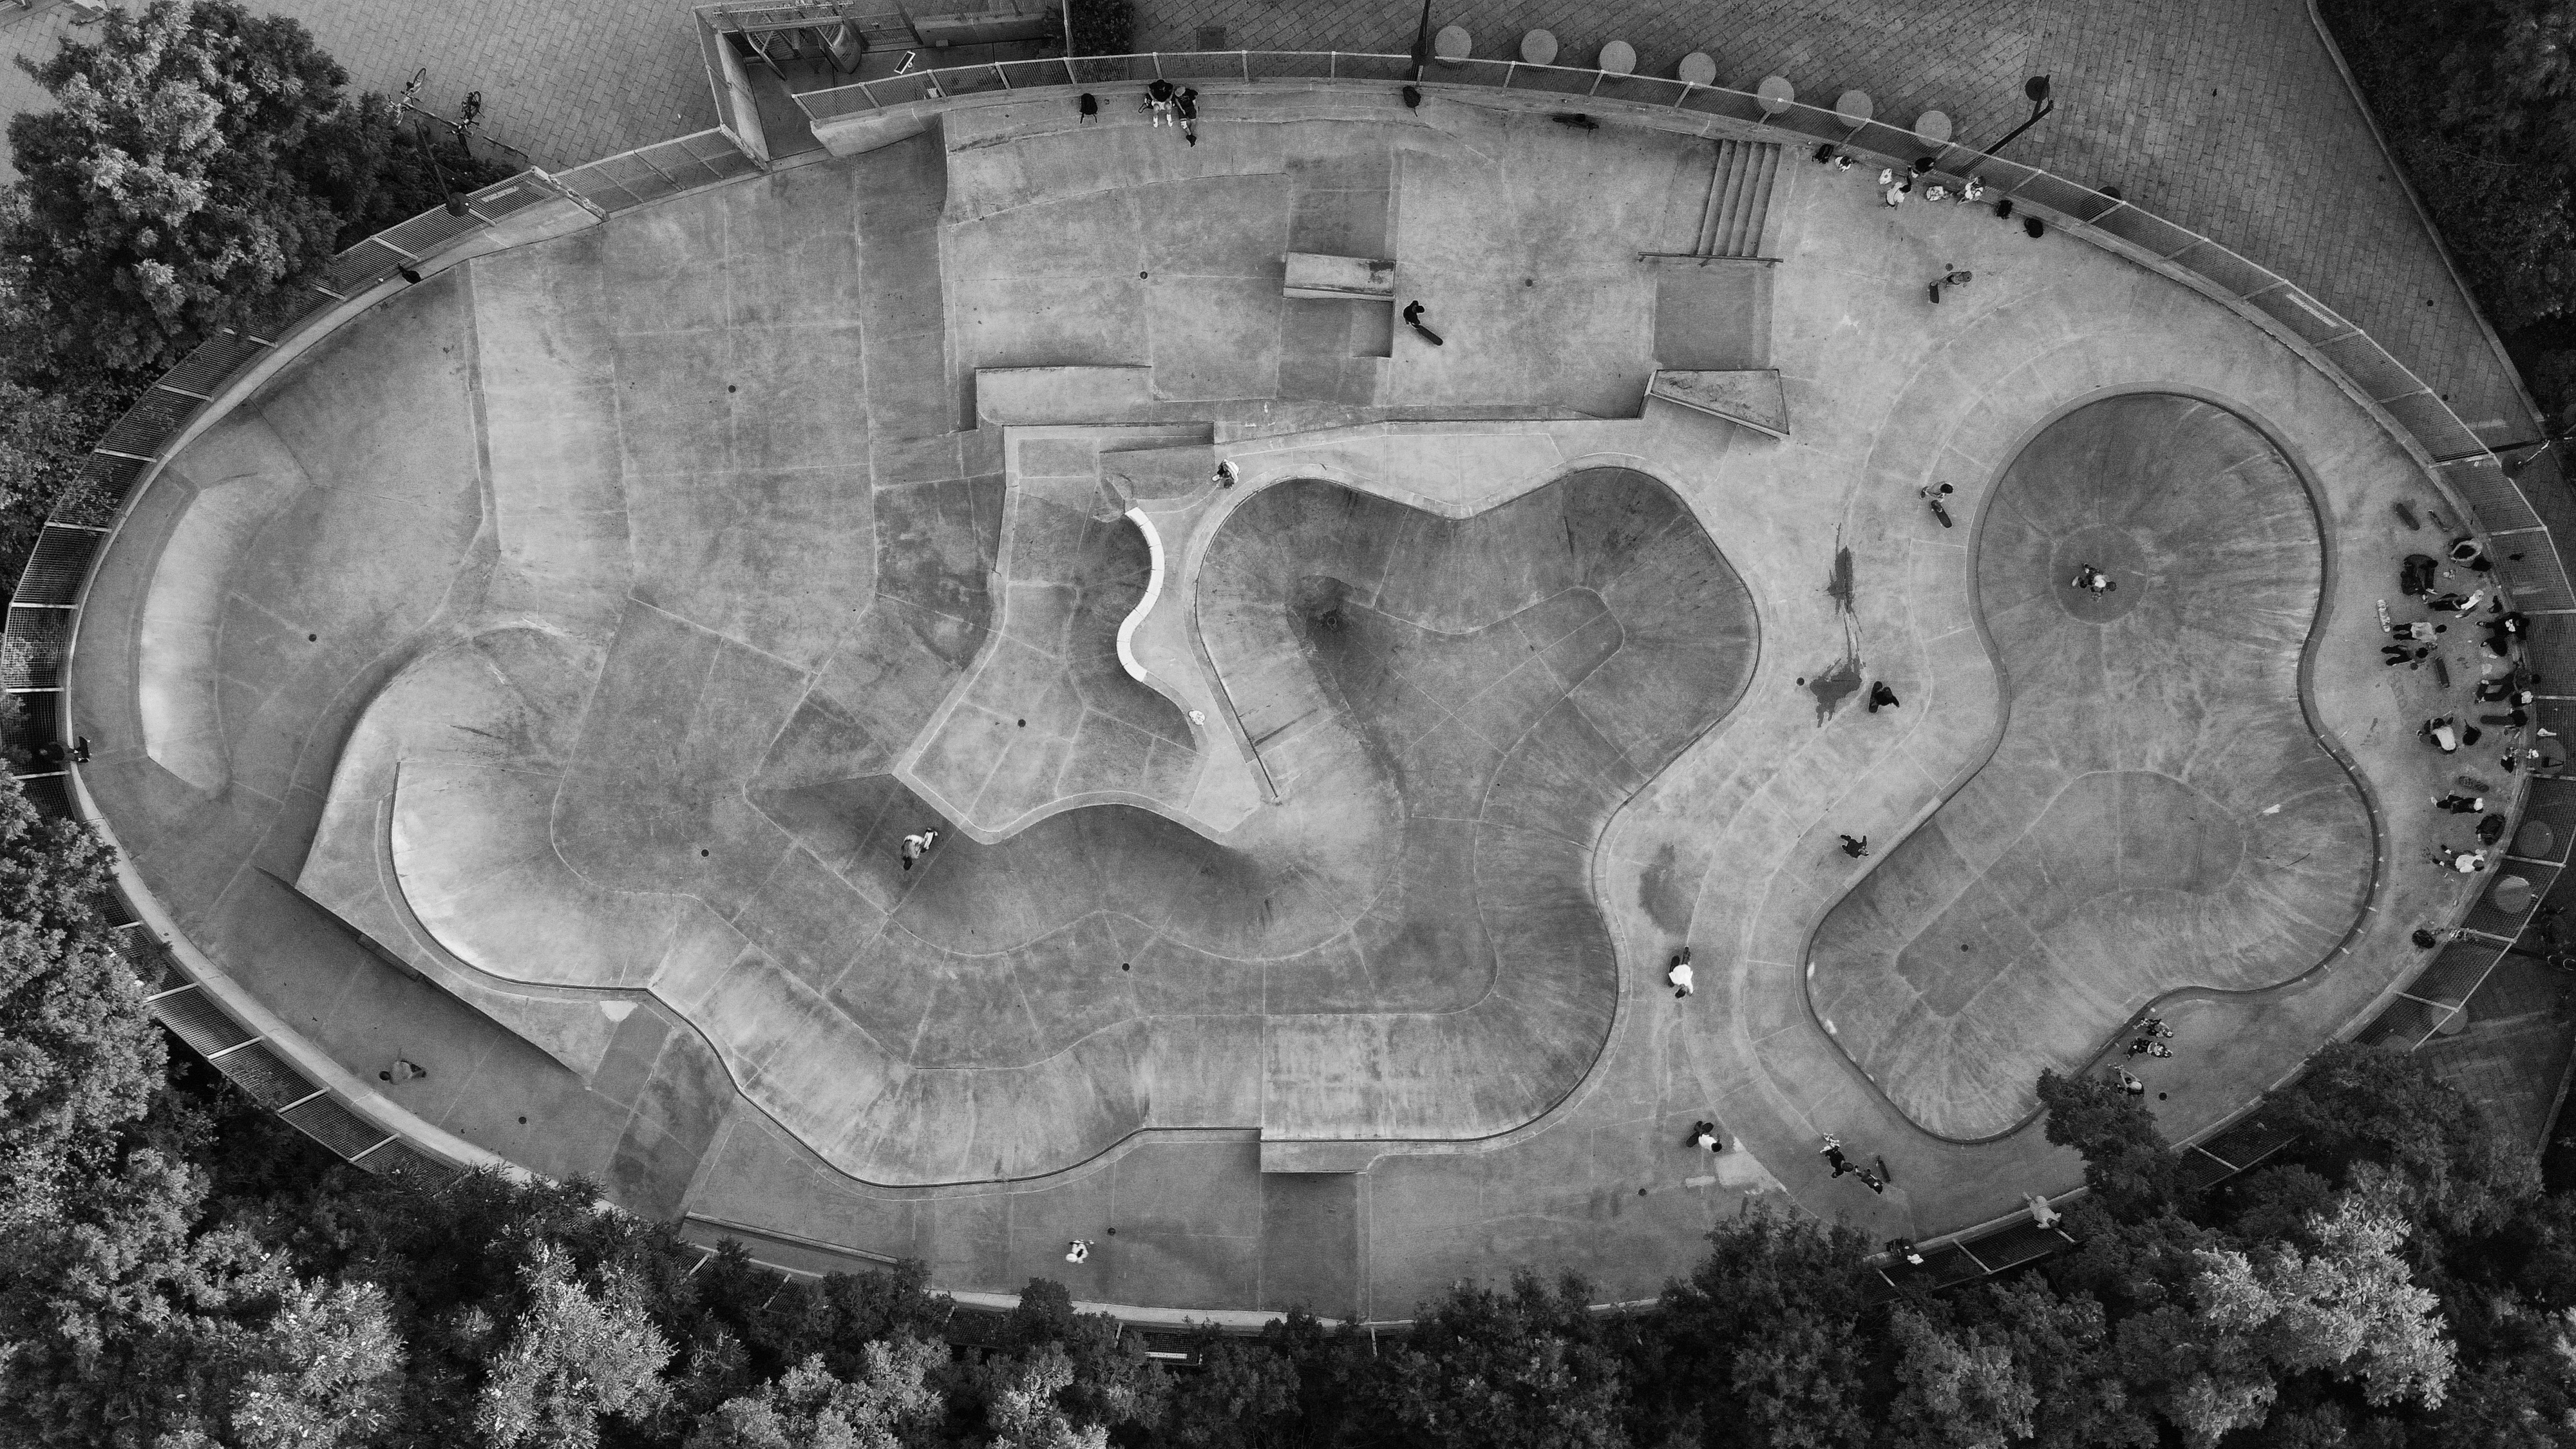
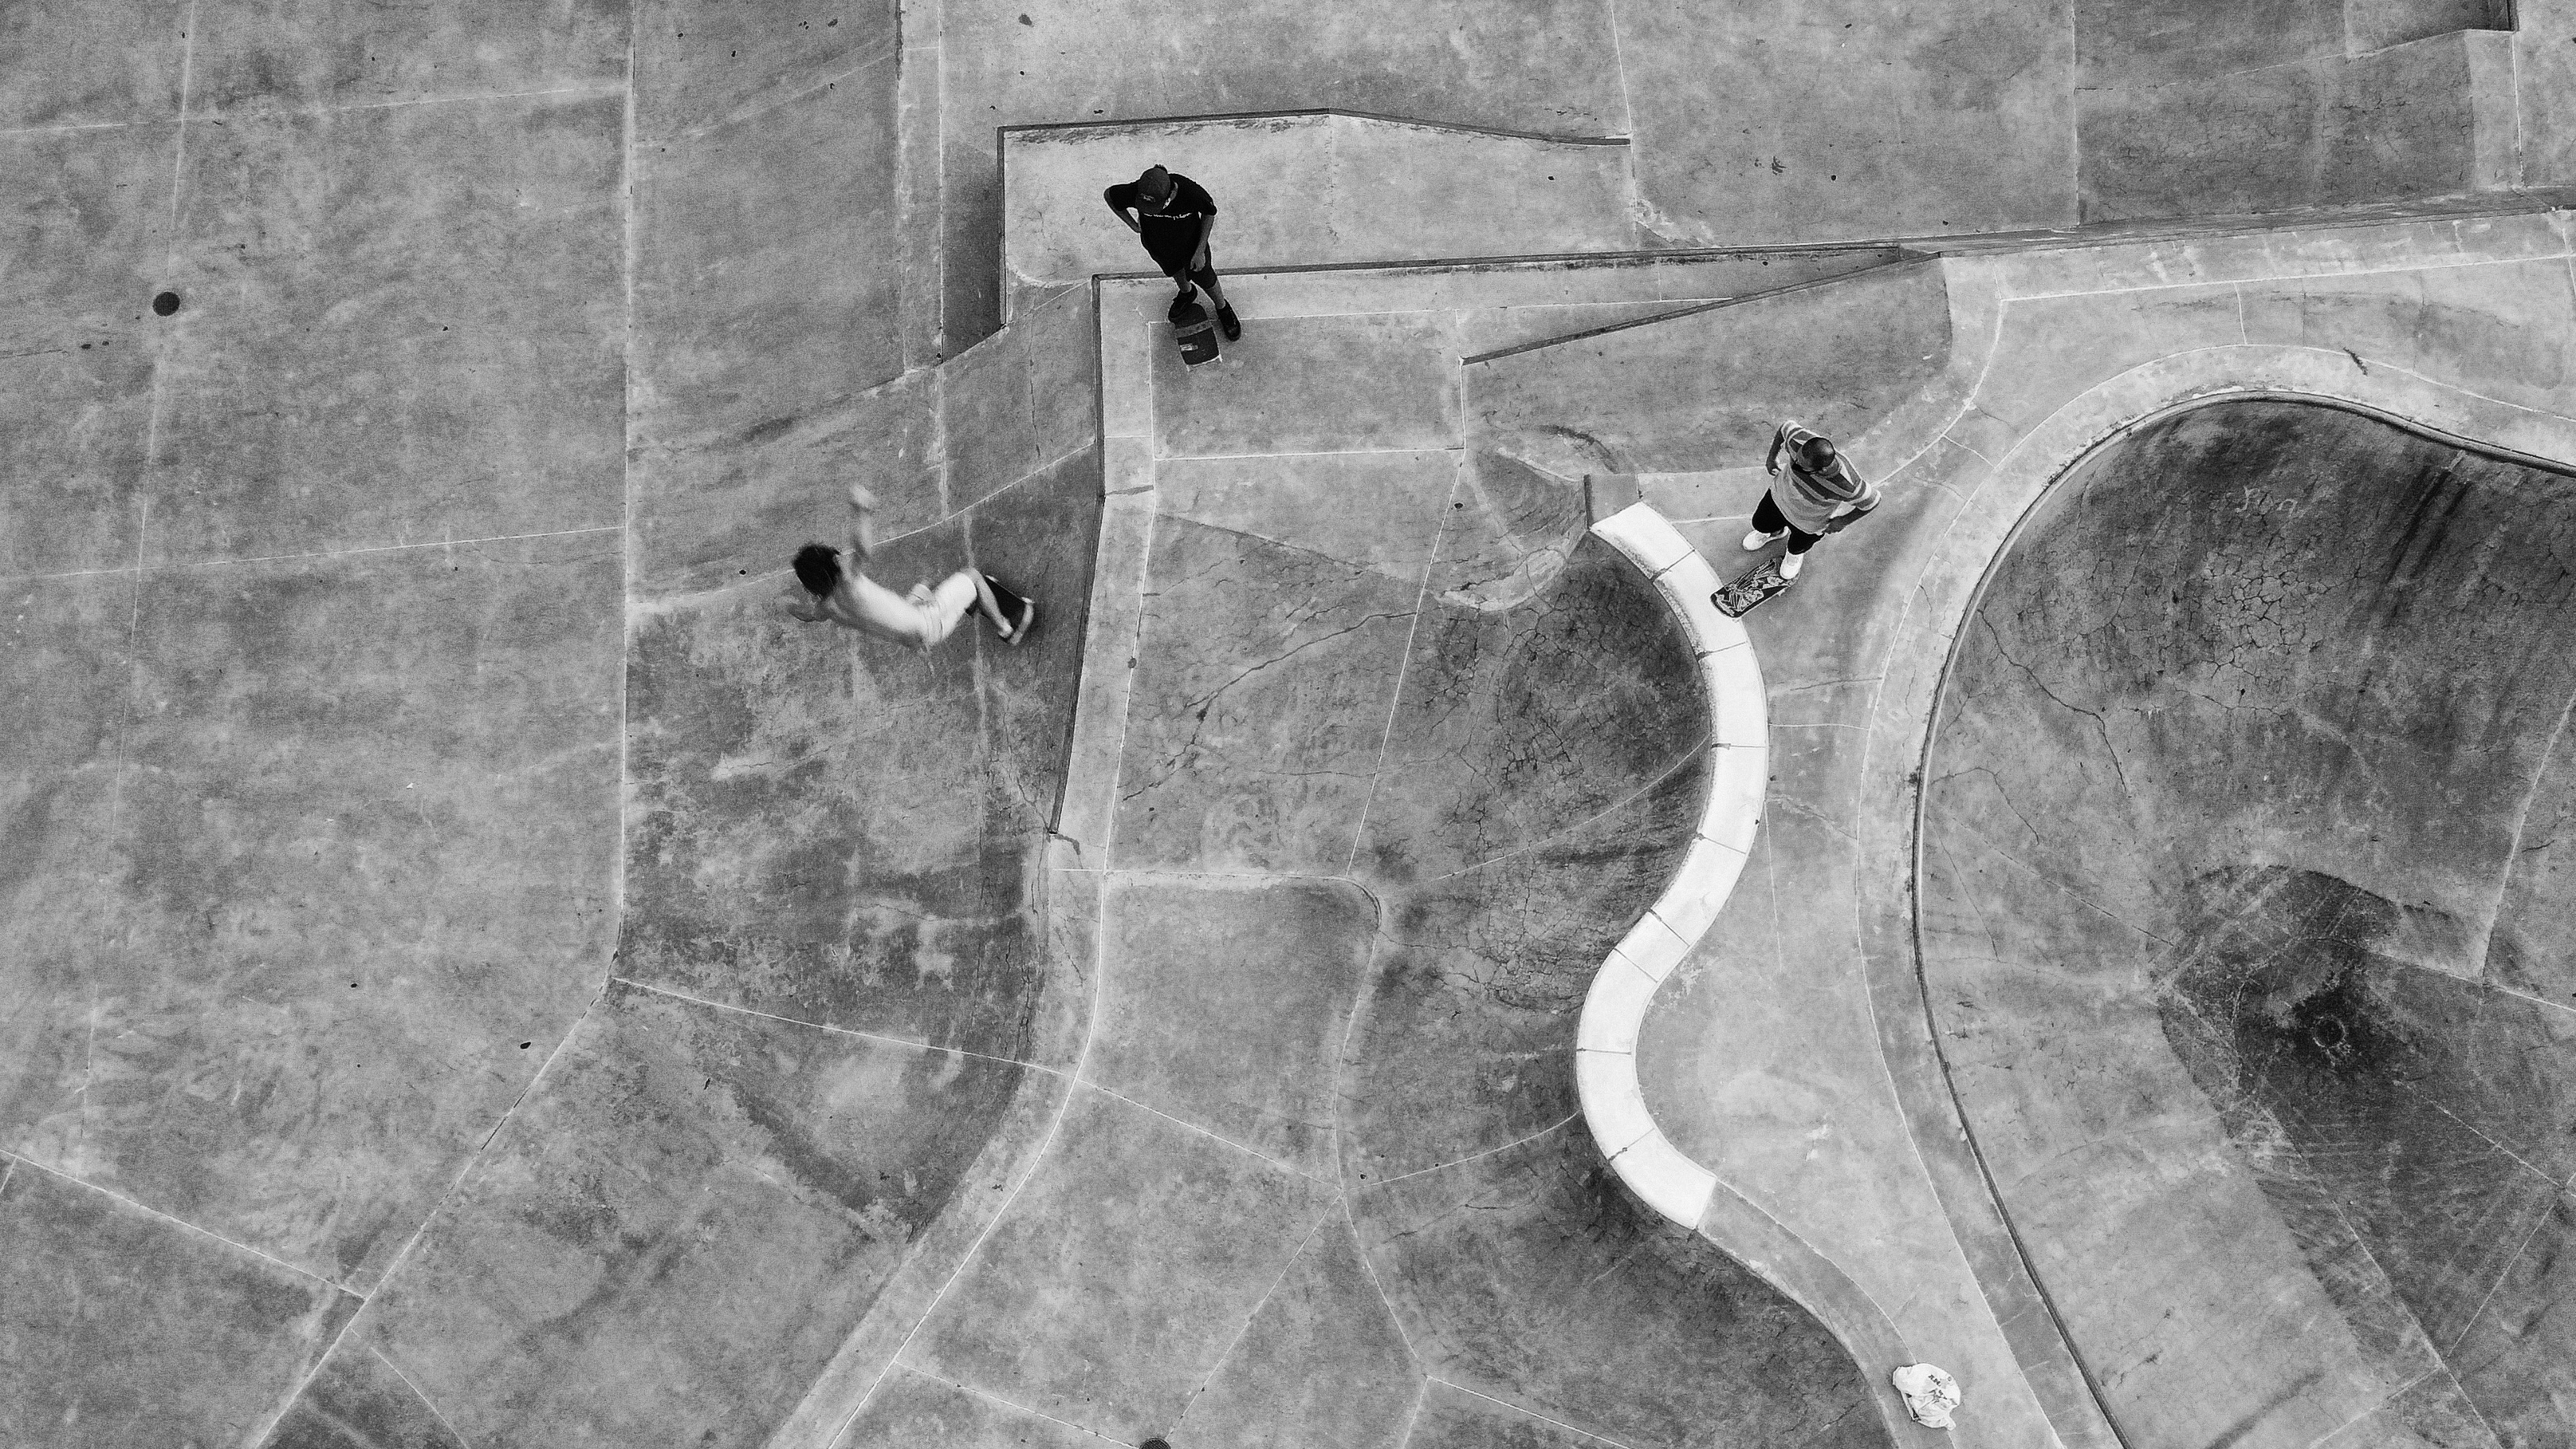
I’ve walked past this skate park at least 1000 times but when I viewed it from above I discovered a geometry and texture that remained unseen from the ground.

Chelsea Piers Skate Park, NYC 2021
Lower Altitude with Skaters
300 % Crop of the above photograph

Sometimes great surprises can occur when you are droning that being on the ground would go unnoticed like this message in the corn fields of Warwick NY in the fall of 2020.

Corn Maze, Warwick NY 2020

Much like a view camera, there are a number of steps to ensure you achieve the image you want. Forget one step and you blow you chance or worse, crash the drone. Here is my “Pre-Flight Checklist” to ensure a successful, fruitful flight with the Mavic Air first gen.

Pre-Flight Check List Done in Water Color

The Mavic Mini is my faithful companion in rural italy where I can fly it safely and see a whole new landscape from above. I keep it in Tuscany, and look forward to a new generation of Mavic to purchase soon. Each release of the Mavic series from DJI just gets better and better. I find it thrilling and what’s really amazing is that it represents a whole new way of seeing that is accessible and relatively wide open to anyone who doesn’t have a fear of flying.

Delaware Water Gap, NJ 2021

Stay tuned for Part Two, Droning with Video.

Do we really need a Black & White Challenge? The Answer is a colorful YES!

Eastern State Penitentiary Sony RX10 B&W Jpeg

Eastern State Penitentiary Sony RX10 B&W Jpeg

Recently on social media, and in particular Facebook, the Black and White challenge has gone viral. The parameters appear to be that once you are nominated by a peer or friend, you have to post one image a day for five days, and on each post, you must nominate another photographer to do the same. The result, if the challenge is accepted, creates a pyramid of photographers posting B&W images exclusively. These rules are stated in the post of the photograph, and of course the nomination tags the photographer. When I did it, I liked to tag the person who nominated me, and on each daily post I made, I also tagged those who I was nominating during the duration of the challenge.

Eastern State Walls


I believe this to be a very interesting social media phenomenon, since it is creative and not just a social media useless trend, like the Bill Gates Millions chain e-letter. You can engage it many ways with deepness, like challenging a photographer who is known for color (I challenged Brandon Remler) or a more timid social media poster and film guy from Japan, my friend Mark Hammon. What was interesting about nominating Mark was that the mainstay of his photography circle is Japanese, so the challenge is spread globally.

Eastern State Pen View

I nominated my wife Barbara, who is a capable of making stunning color images and the occasional b&w. She took it to a new level and put the parameter of “some of her favorite things” and her posts are of objects and places that she loves instead of arbitrary images. She also nominated an Italian co-founder of the Cortona on the Move Photography festival, thus expanding once again across cultural and geographic boundaries.

Eastern State Walls


I tried to find out where and who the originator of the challenge is, but alas, that appears to be lost in the web. The Phoblographer made a good post about the challenge as well. Their post elaborated on what makes a good b&w shot. Pretty cool. Another aspect is that the level of photographers participating is very high, Sean Kernan is in on it. At this point, the challenge has gone through my photographer circle and some stunning work has been posted.

The above images were all shot at the Eastern State Penitentiary in Philadelphia. The reason I chose to include this catalog of images for this blog post is that the location begged to be shot in b&w.


I believe this to be a blast, and very good for our medium. It’s actually a useful social media endeavor that can be challenging and interactive. Social Media is always evolving in unexpected and welcome ways.


What about you? Have you accepted the challenge?

The Summer Project: Back to the Analog 1950’s

NikonGear


Every summer I self assign myself a photo project for my August Tuscan vacation. Sometime in May or June I start to think about what I’m going to do and since I have been going to the same spot for 12 years straight now, in the past I have shot 8×10 landscapes (twice), 4×5 landscapes (and made 4×5 cyanotypes under the Tuscan sun), a study of the Terontola house with a Hassalblad (for a handsome book), Instant Italy (all shot with Fujifilm Instax), Olympus Pen FT half frame, and many digital photographs including Italy Looking Up (shot with the Leica M8.2). The past two years I have enjoyed using the Fujifilm Xpro1 extensively and showed them in this blog.

This year I was in a quandary. I considered doing portraits, but truth be told, the effort to work my Italian subjects is too daunting for a vacation, I enjoy the summer work because it shouldn’t be hard, it should be completely relaxing. Over the years I have set up a primitive darkroom in the back of the house. Primarily for developing film and lately doing contact printing. I always dreamed of having a full force darkroom back there, since I have been darkroom-less in NYC since I arrived.

This week I have read two interesting web pieces about film photography. One about an Indian Photo Club dedicated analog film and the other from an old buddy of mine who has relocated Japan and makes a strong case for shooting film with personal reasons. Both of these musings have these influenced me, they got me thinking. I am not going to drone on and on about the film vs. digital argument. That’s moot, and I have done that already in my article “The Merits of Shooting Film in the Digital World” for F295. What got me was the simple joy of hearing a shutter click, and the feel of advancing film with a lever. Loading film, unloading film, and then loading film onto a reel and putting it into a light proof tank. Mixing chemicals, timing it all, reviewing the exposed negative up to a light, cutting the negative, and then lastly, printing the negative. Working in the dark, holding that finished print in your hands after it has dried. Showing the print off, examining the print and noting how you could have printed it just a little bit better.

It’s simply sublime. There is no substitute for this process. It is the essence of photography; skill, vision, craftsmanship, and art. It’s black and white, it’s subtle, and it’s shadows and highlights dancing on fiber paper. Even as I write this, I’m contemplating bringing the last of my marshals oils and perhaps, doing a little hand coloring!

I fired off an email to my friend Nicola, one member of the triumvirate that is behind Cortona On The Move, a photo festival that occurs in the summer months in Cortona, if he could source me an enlarger. He replied he had a cold light Kodak sitting in storage! Perfect, I love a cold light source, and better yet since the back room of the Terontola house is dusty as the days are long.

So this leads me to the choice of cameras. I have a nice collection, actually I pride myself on my camera collection. Since I’m going back to roots here, I think I’d like to keep it simple and that means lets forego large format. I’m thinking 35mm. And my favorite 35mm camera system I have is my vintage Nikon S2 rangefinder. She’s a beauty right out of 1953. Sexier than a Leica, made like a tank, and unlike the more popular Nikon F system cameras, the S2 is a rangefinder. For lenses I’ll bring the entire collection, which includes; a super duper sharp 50 mm 1.4, a great semi wide 35 mm f 2.5, a sweet portrait shooter 105 mm f 2.0 and then just for fun, a 135mm.

I can’t wait to shoot all day and print all night. So keep Suspect Photography bookmarked and I’ll be posting some classic photography during the rest of August.

~David


Film Simulation Modes on Fuji X Pro 1

18mm 1/30th at f/2.0 B&W r ISO 800 B&W- Y JPG

So I’m old, I cut my photo teeth on film, I predate digital photography. Back in the halcyon days of film the choices were plenty and you could match a film to your style or the subject. Kodak was king, but then in the late 80’s Fuji Film came out with a highly saturated slide film (e6) called Velvia and the game changed. Fuji roared into the market and just kept coming up with innovative professional emulsions that defined the film mindset and challenged Kodaks hold on film. These Fuji films all had a certain look to them, some subtle and some bold. Velvia possesses a super saturated slightly contrasty look that became the darling of nature shooters. Provia was the “go-to” film for product, commercial and general use, while Astia and its lower contrast smoothness hinting with a touch of warmness was perfect for portrait and fashion work. These were just the slide films, in the print world of negatives (c41) you also had a bevy of specialized films such as Reala for portraits, Press film for journalists (very pushable to higher iso’s), and some great b&w choices. Neopan 1600 was a wonderful high speed fine grain film, and I still shoot with Across 100, a smooth and fine grain emulsion that produces lovely prints.

Digital Photography is very versatile, in post  you can easily adjust the look of your image to match the attributes of these films. In many ways, the art of matching a film emulsion to your subject is lost these days but was crucial back in the day. The X Pro 1 however has something very cool that us old shooters dig, it’s called “Film Simulation Modes” and in the menu we can bias the camera to shoot like a particular film. I teach a class called, “finding photographic style” and I encourage people to work with in-camera digital styles to fine tune their vision. Shooting this way forces you match subject, genre, and style to a look, easily achievable with a film sim mode. The X Pro 1 takes it even further and offers a film sim bracket mode. You can assign three films and take one shot and the camera gives your three images each with a different film simulation. It’s a bit slower to work this way, as the process time takes few seconds. But the results are fun and shows you the comparison between three types of classic Fuji emulsions.

Barbara models for me at Central Park trying out different film sim modes.

The X Pro 1 offers you a choice of Provia (standard), Velvia (punchy & saturated), Astia (soft), Pro Neg Hi (contrasty), Pro Neg Standard (great range of tones), Monochrome (b&w), Monochrome Y (Yellow filter for contrast), Monochrome R (Red filter for higher contrast, great for clouds), Monochrome G (green filter for smooth skin tones), and Sepia tone (warm old feel).

35 mm lens 1/4000th at f/1.4 Provia ISO 200 JPG

I have been shooting Jpegs with the X 1 Pro on account of no RAW support from Fuji yet, so I haven’t been able to test how a RAW image would work under a film sim mode. The merits of this feature are certainly debatable, but I stand by my statement that it allows you to instantly “own” your image in a unique way. I would advise you to explore these settings both in color and b&w. You just may be surprised at the path this film simulation takes you, or at least get a warm fuzzy feeling now that you can shoot with Velvia again… sort of.

~David

%d bloggers like this: