Suspect Photography

words and images from david george brommer

Category: Gear Reviews

Exploring the TTArtisan Tilt 50 Lens: A Hands-On Review

As many of us, I’m a gear freak and love optics. I was poking around the Nikon Z lens options on the B&H Website and came across this lens, the TTArtisan Tilt 50. It’s part of this wave of ‘cheap cost’, but ‘not cheaply made’, Chinese lenses. The 70’s were a hey-day of weird, wide, and tele lenses from oddball companies; and then in the 2000’s Lensbaby hit the market. Now with the rise of easy manufacture (barring tariffs) lenses, and manual film/video lens needs, there is a plethora of this type of equipment to try out. Long story short: I bought the lens on speculation, and was pleasantly surprised on all fronts!

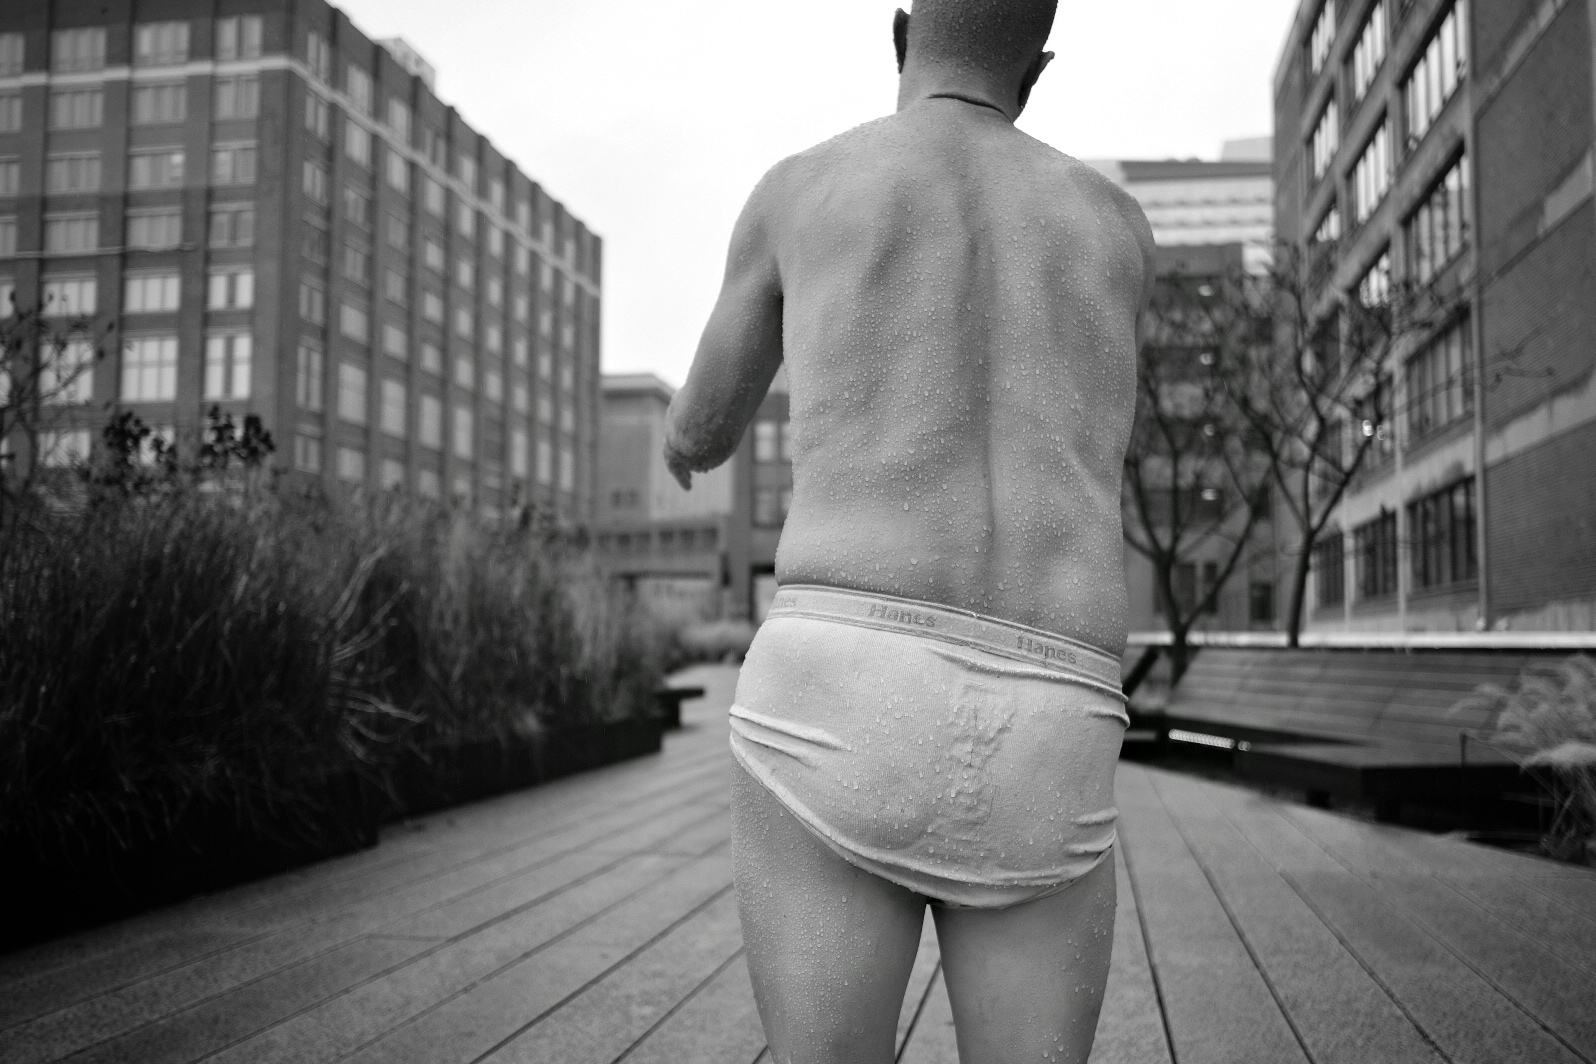
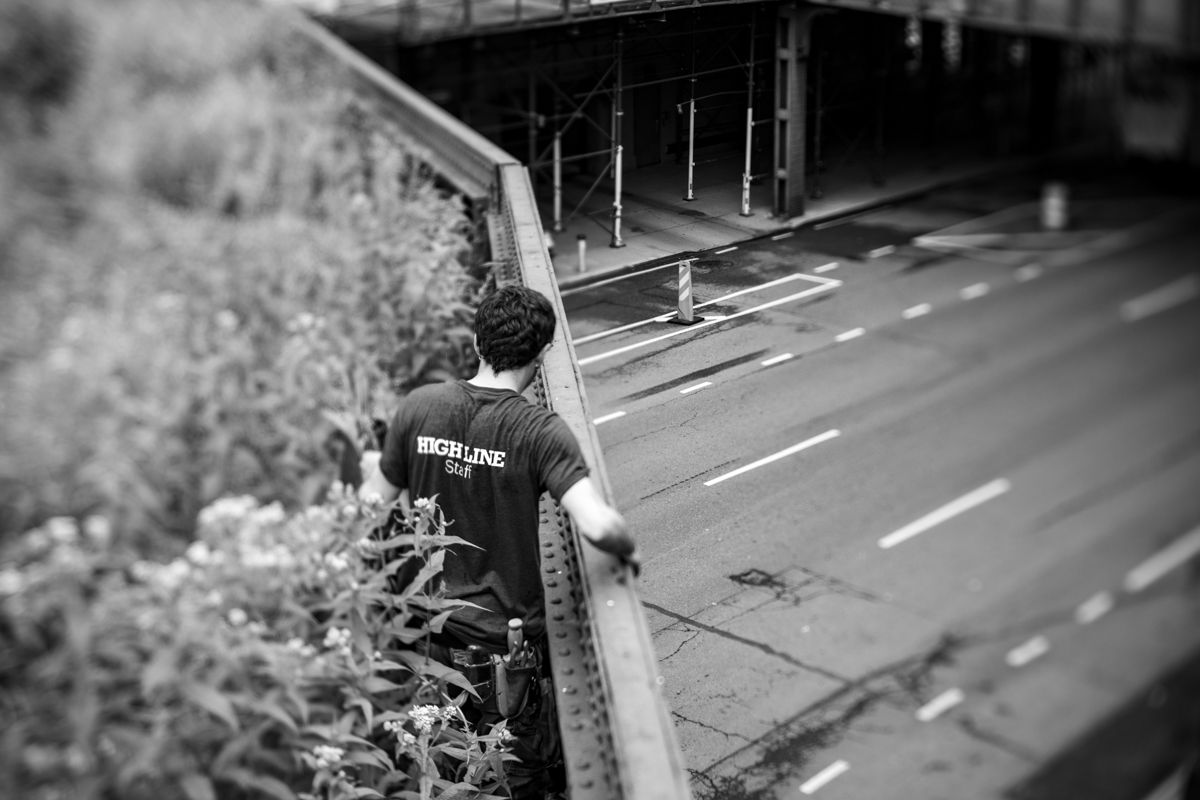
I slapped the lens on a Nikon Zf with focus peaking turned off (I found it hard to “see the image” with the shimmering distraction), auto iso on, aperture mode, B&W switched on, Raw. Making sure “ok to shoot without lens” setting is checked. I took a morning stroll on the Highline excited to try out this fine feeling lens.

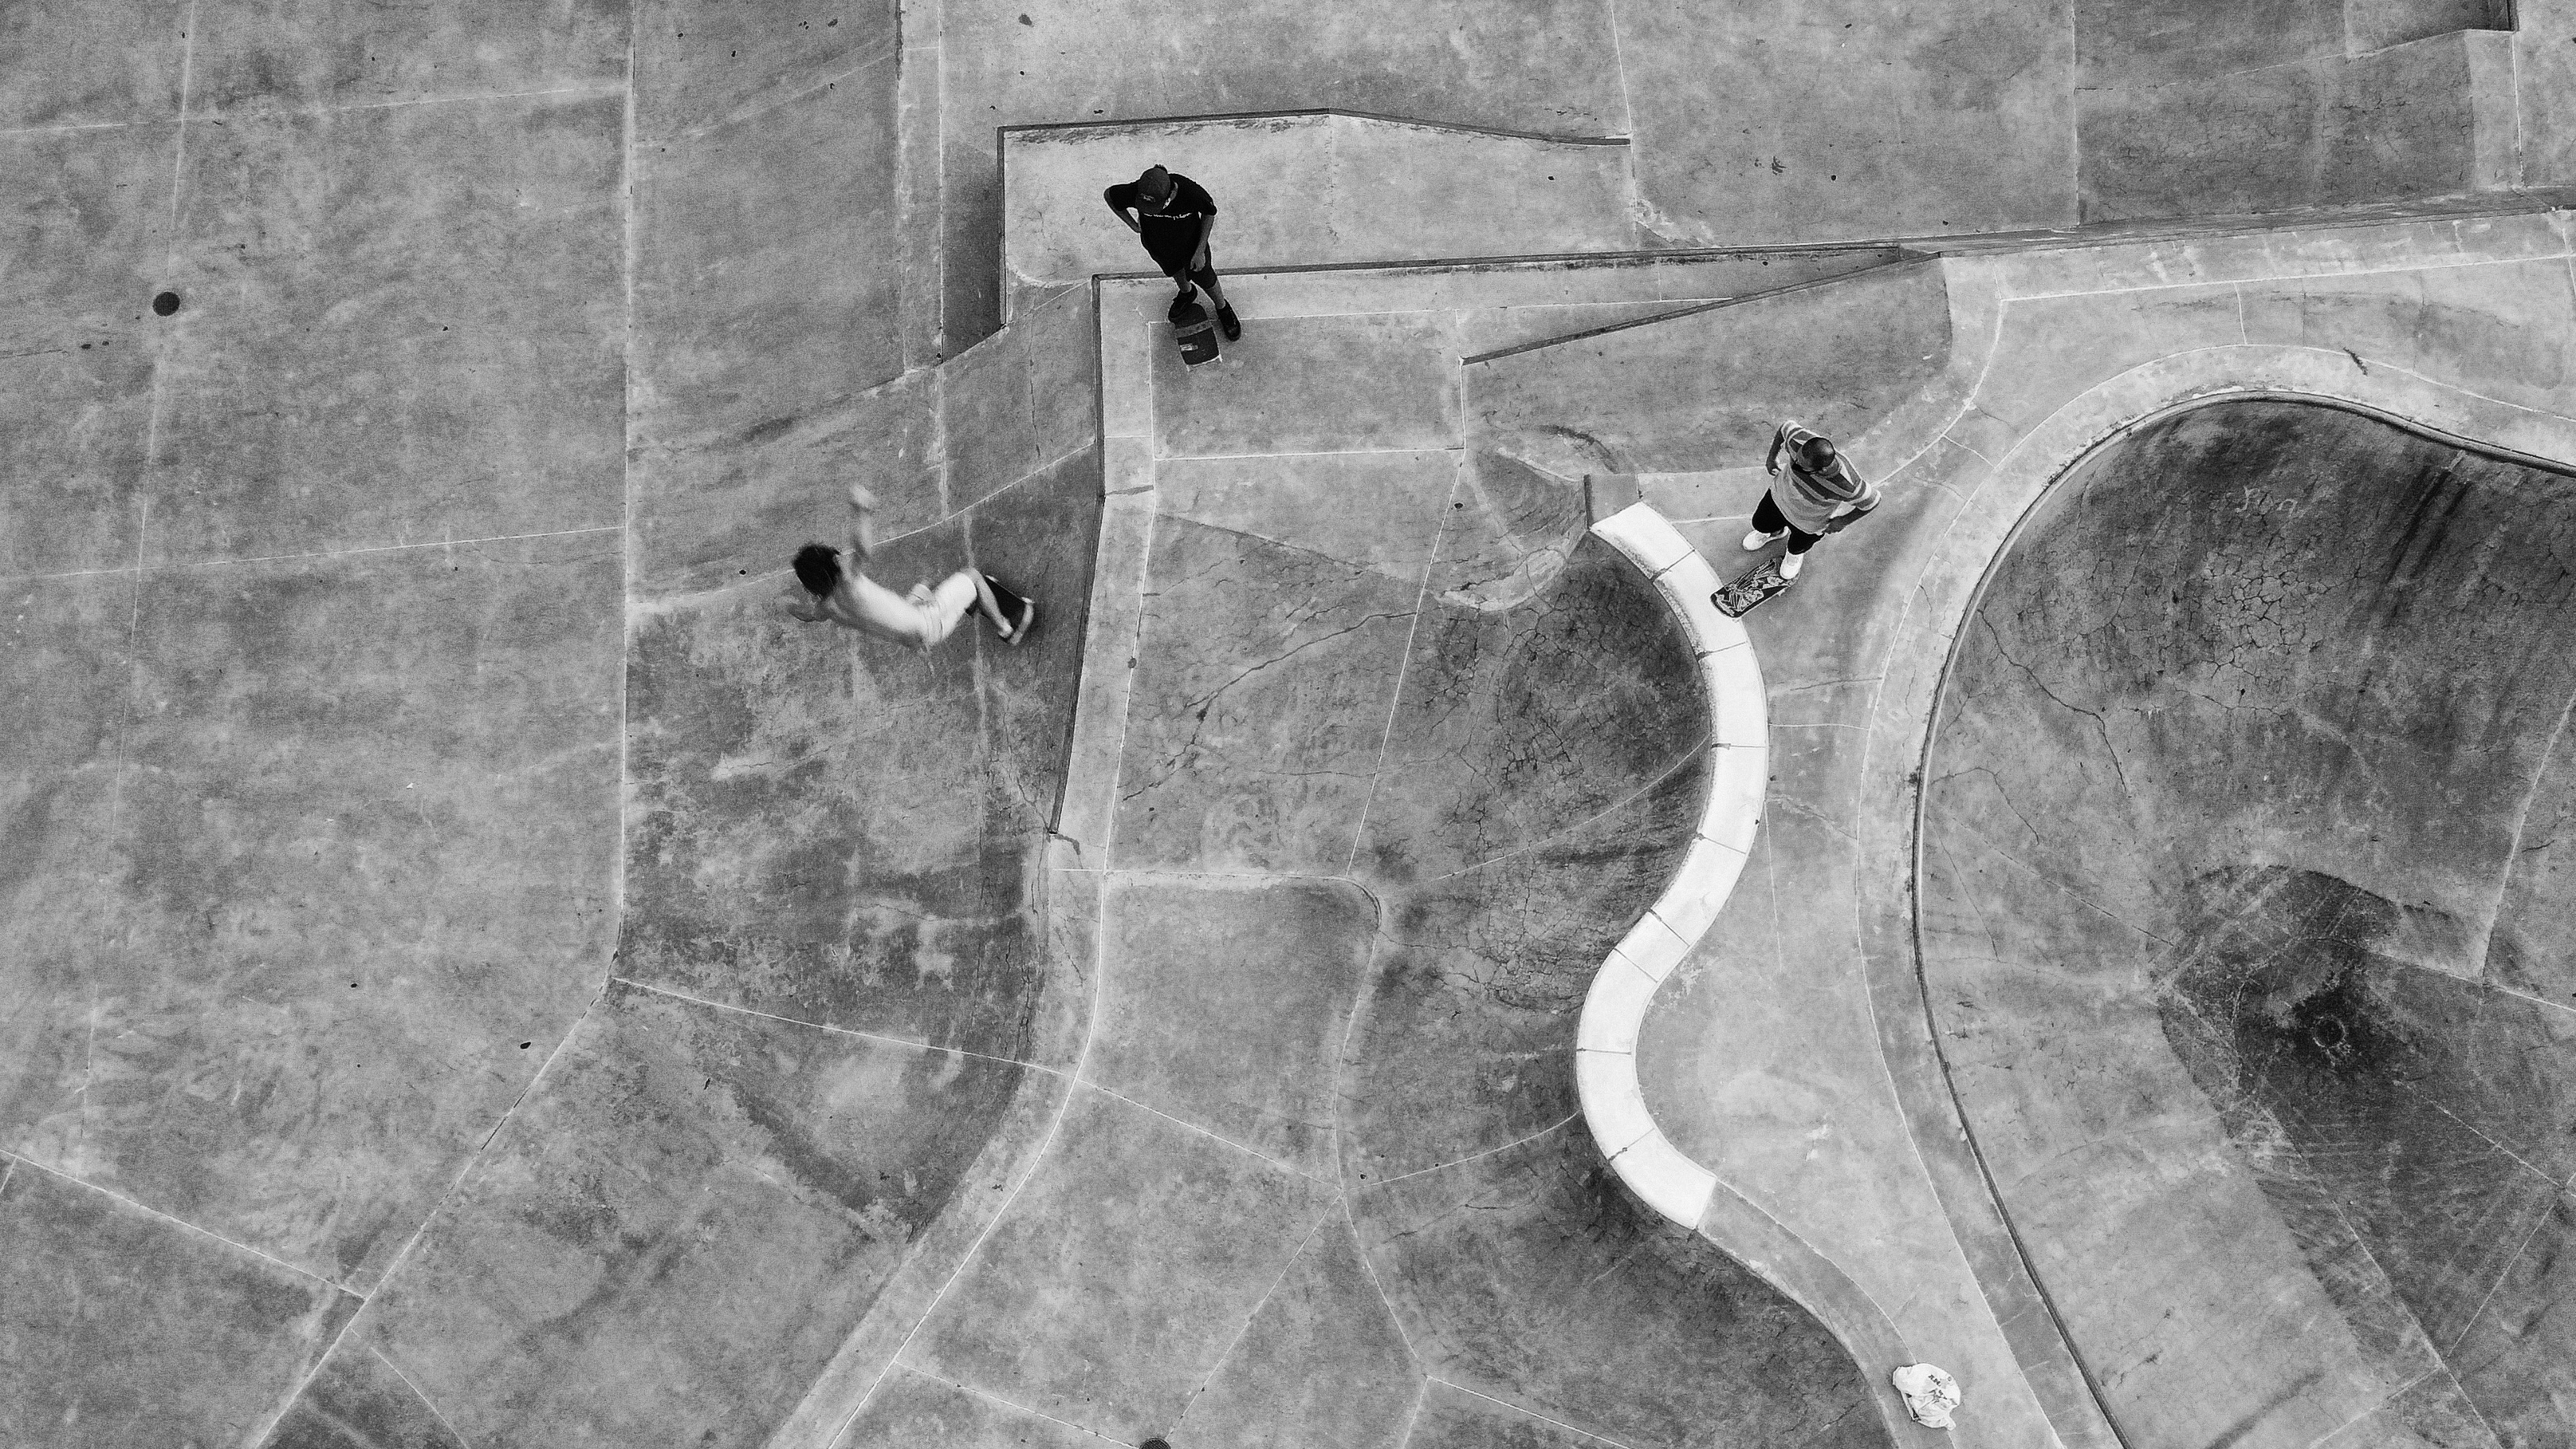
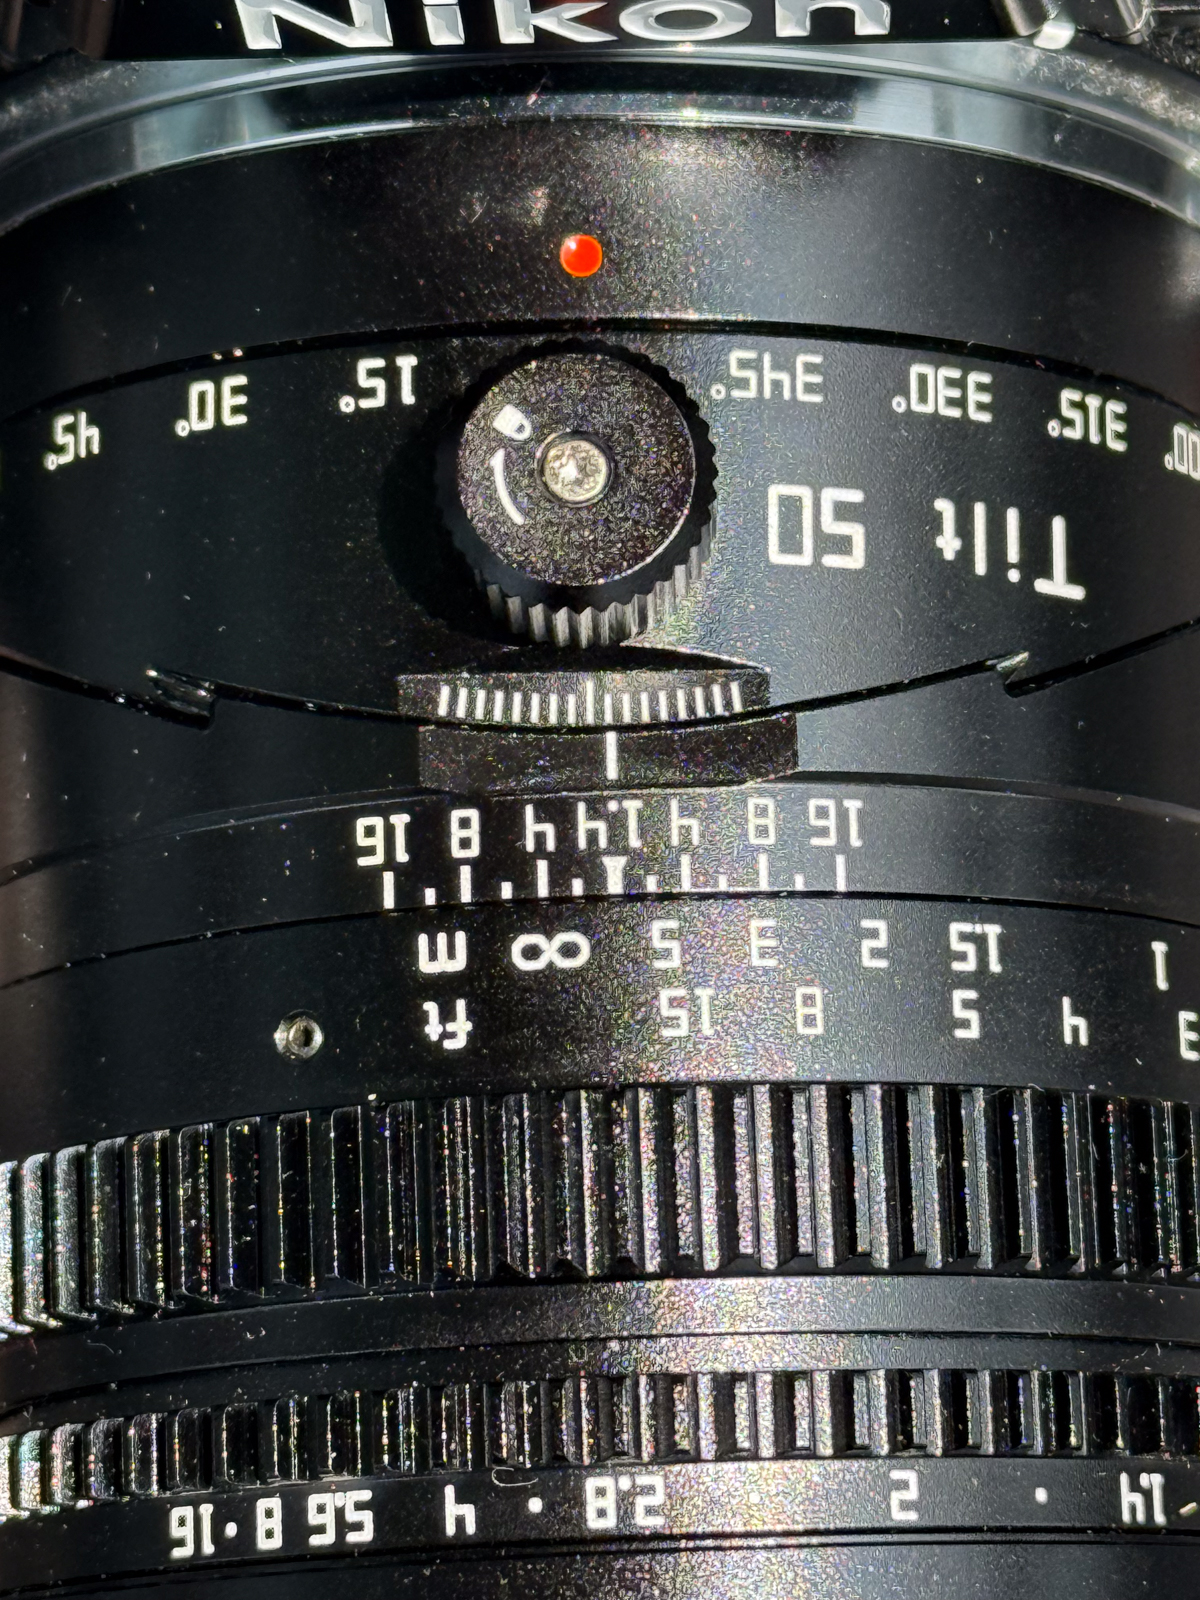
The lens has two unique controls, one for the tilt and the other direction of the tilt axis. By strategically turning these two, in tandem with the manual aperture, you gain access to a “strip” of in focus view. You can “spin” the lens to make that strip go anywhere. The lens also has a wonder full depth of field bokeh and close 19.7″ / 50 cm minimum focus.

The actual sharpness of the lens is questionable, it’s not a view camera, but that’s not the point. Straight on at F8 it’s sharp, but it falls off the more wide we open. However I found it sharp enough to certainly buy and keep in my gear bag. It’s fun to use and produces unique results.

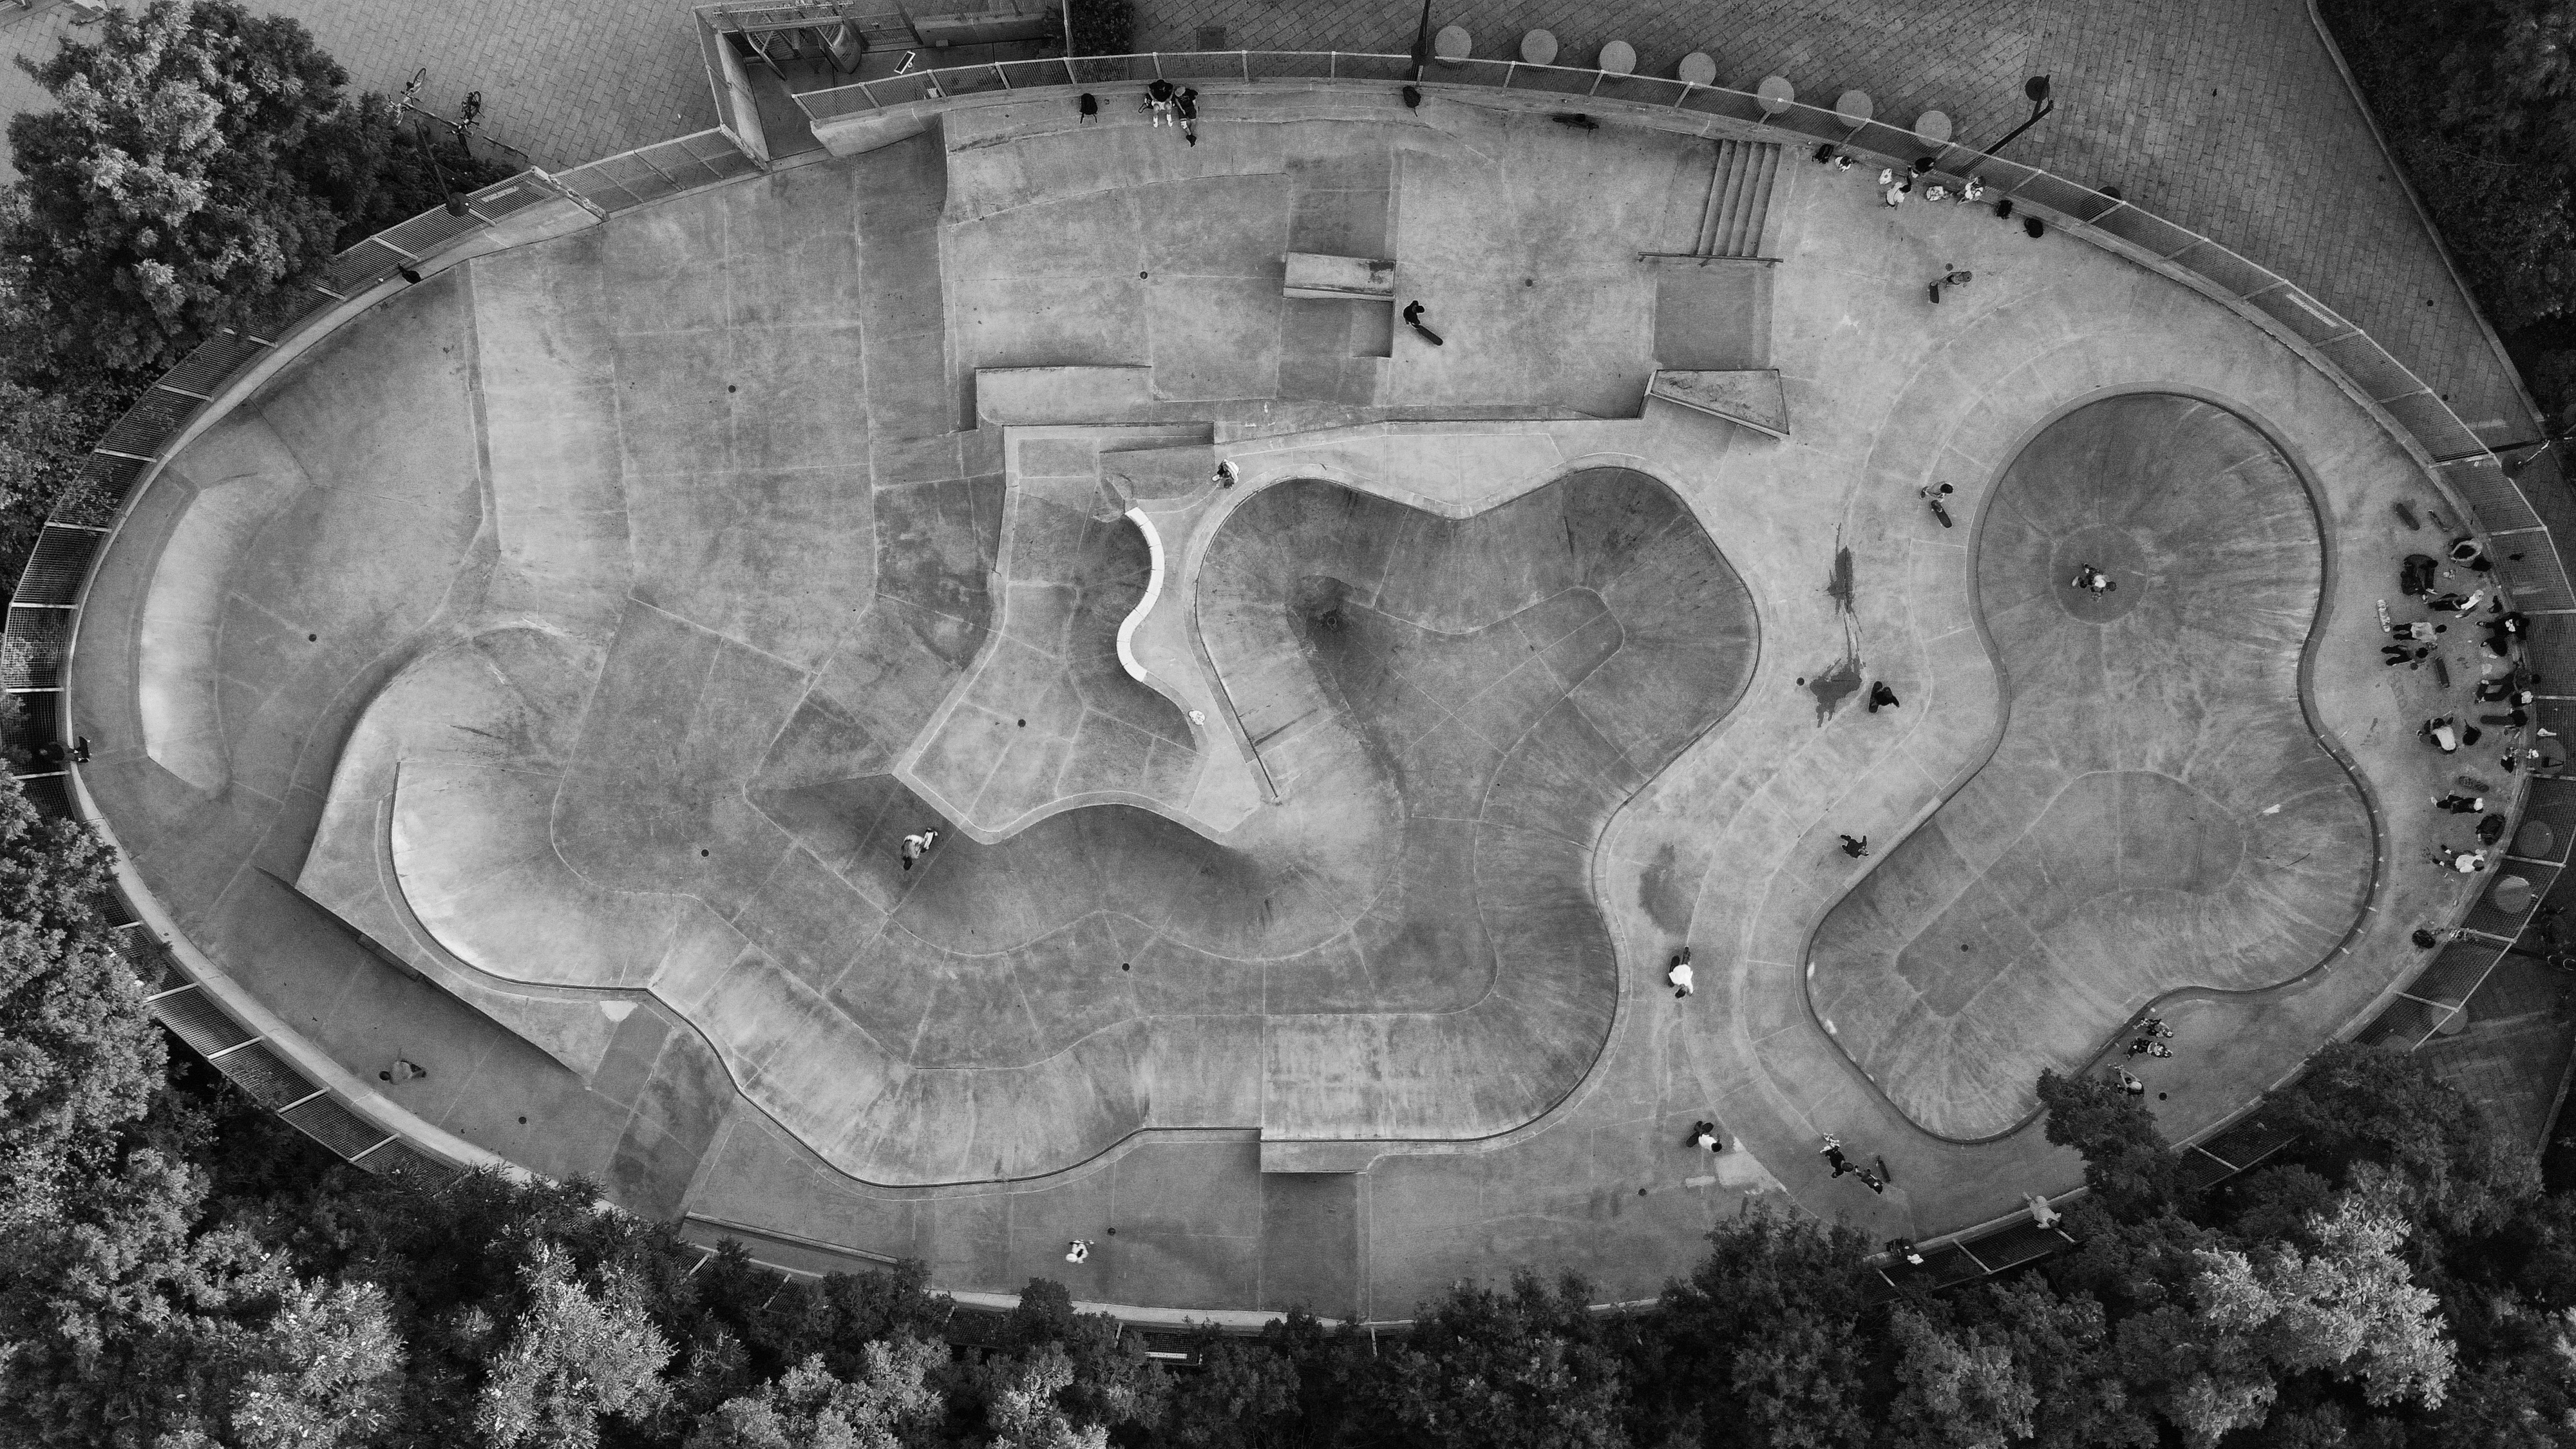
The lens likes height to give it perspective. Walking the Hhighline was actually perfect with its vantage points and strong horizontal lines.

We cruised out to celebrate the fourth of July out in the Hamptons in the Buick and I grabbed the same combo.

Couple of notes, you have to have deft and strong fingers to maneuver the tilt and rotation functions. A tripod couldn’t hurt, but I used it handheld during my exploration of the lens.

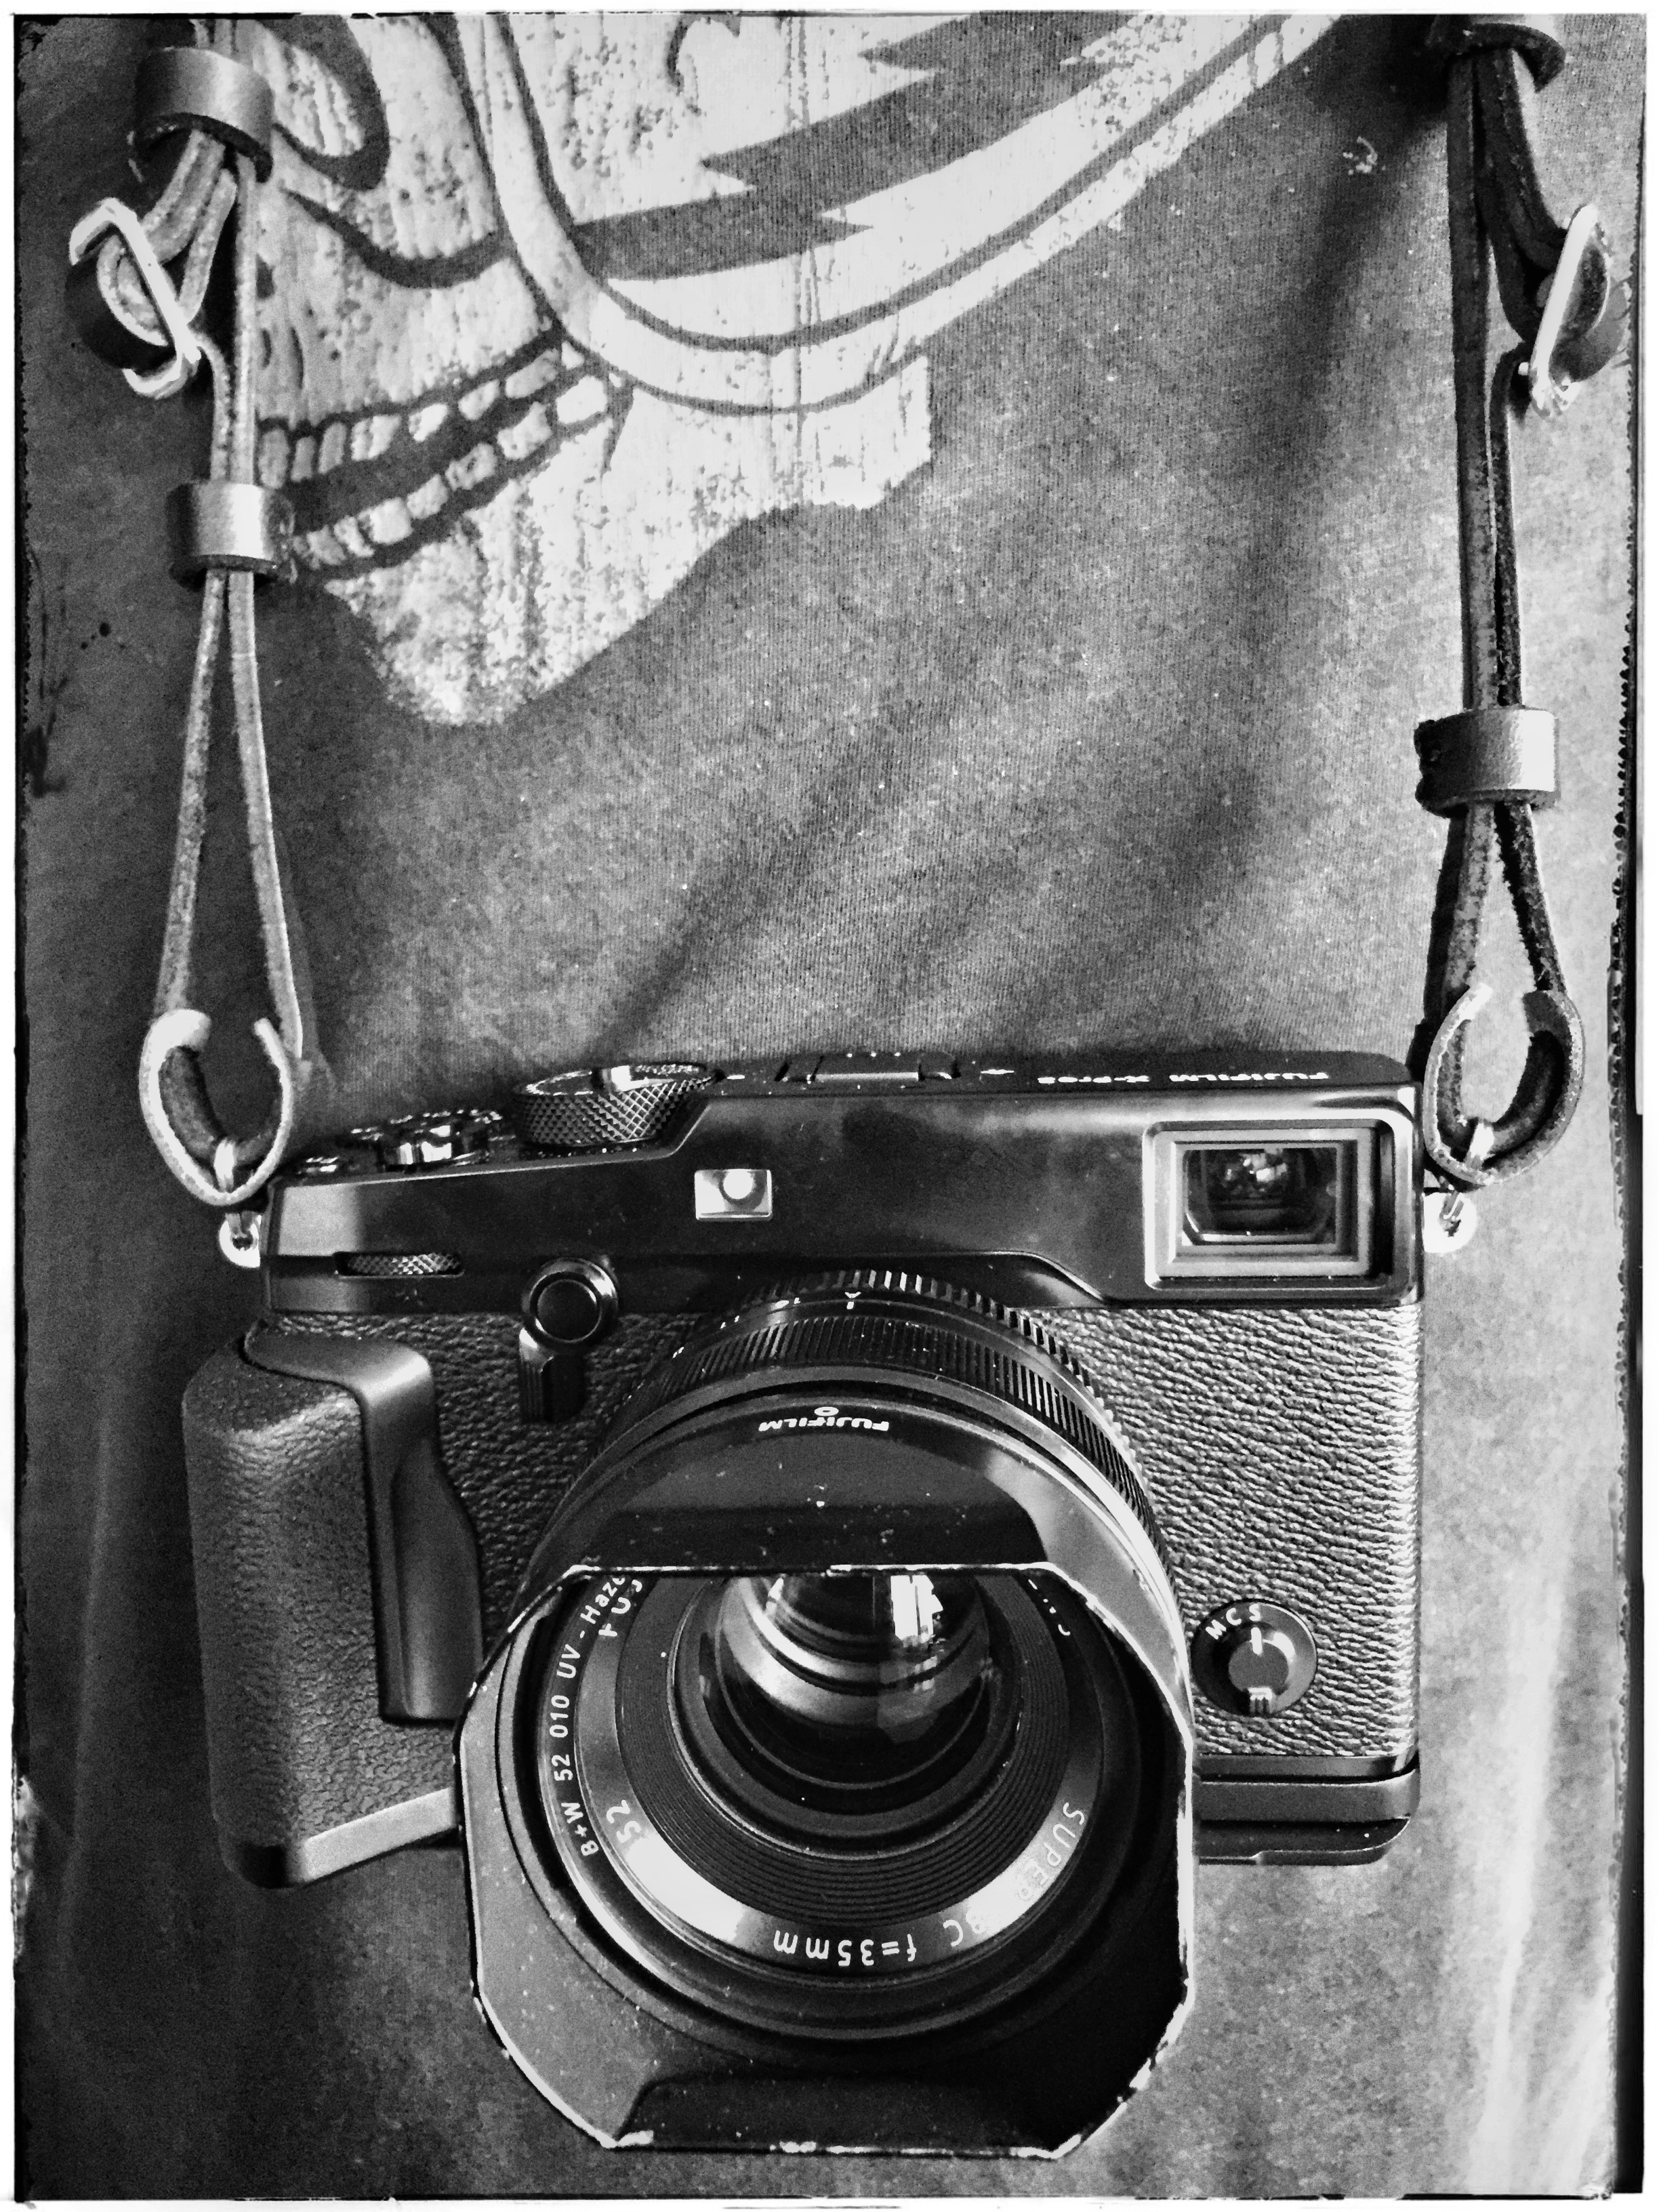
My favorite wall north of MoMa. Vintage camera wall by Brandon Remler.

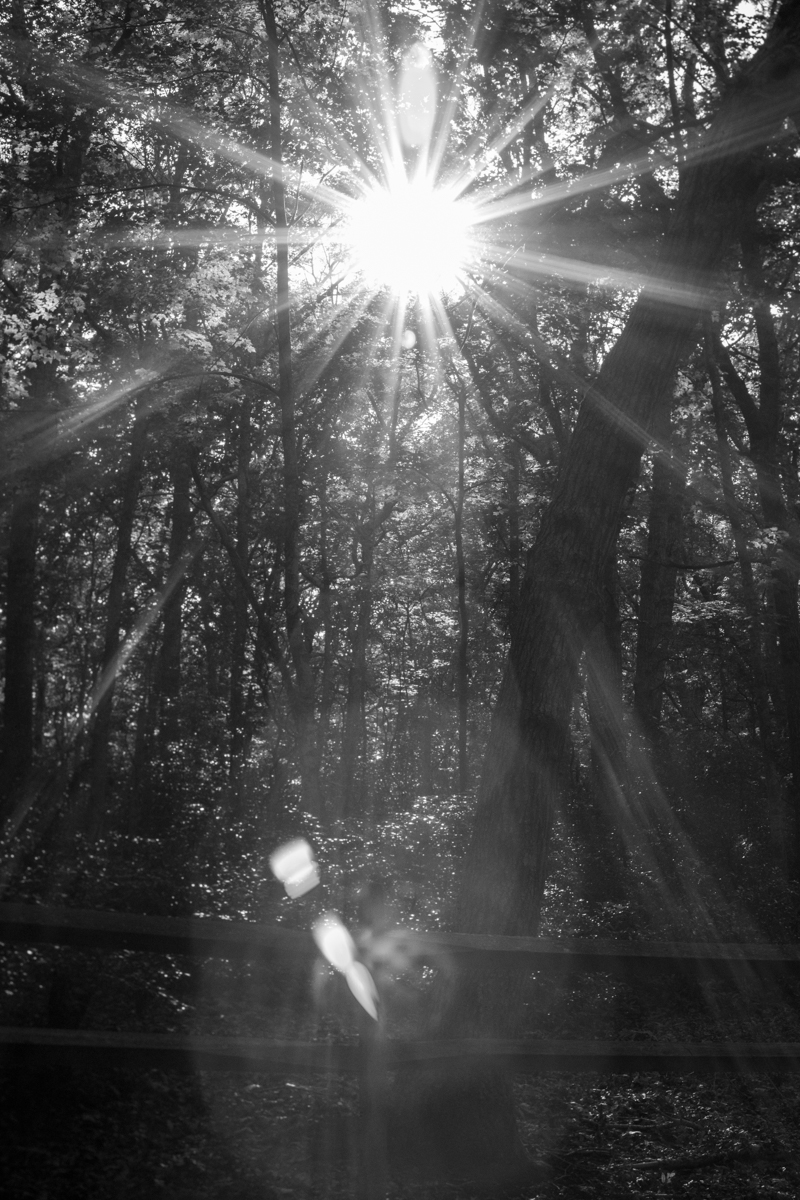
Shot this one at f16 amined up into the sun through the trees. I wanted to see how much wackadoodle the flare would cause. The result, enough!

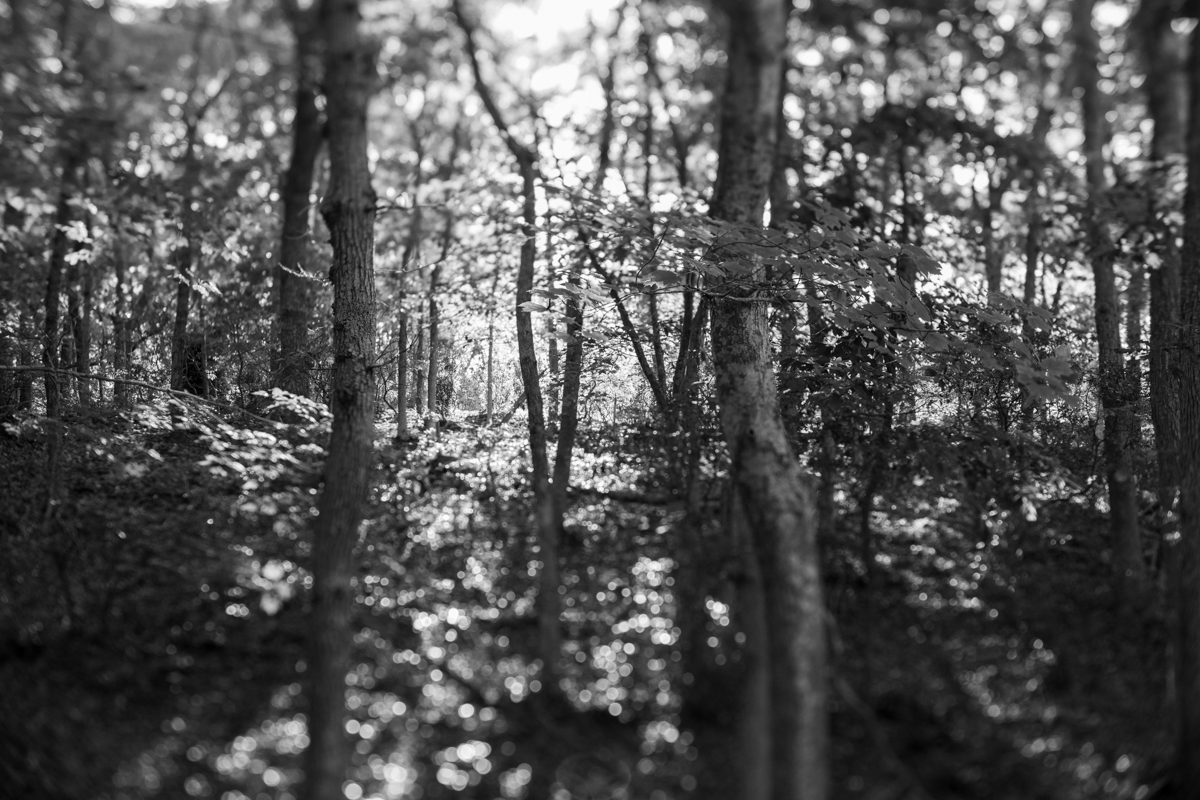
Shooting the Tilt 50 at f. 2 to 4 seems best. Shooting wide open at 1.4 makes the circle very tight. Opening up two stops is the “sweet spot”. It’s the dreamy effect. I dig it. Is it gimicky like full frame fish eye? yes. But the Tilt 50 does have its place. I’m thinking a start and finish workout project, shot only with the Tilt 50. The tilt effect makes things tiny and if used correctly, can help telling the story by highlighting via focus on subjects.

I don’t recommend it for straight shooting. Not having the effect makes it less desirable, but still, the bokeh is outstanding and for the cost… Certainly less than Eisenhower’s collar.

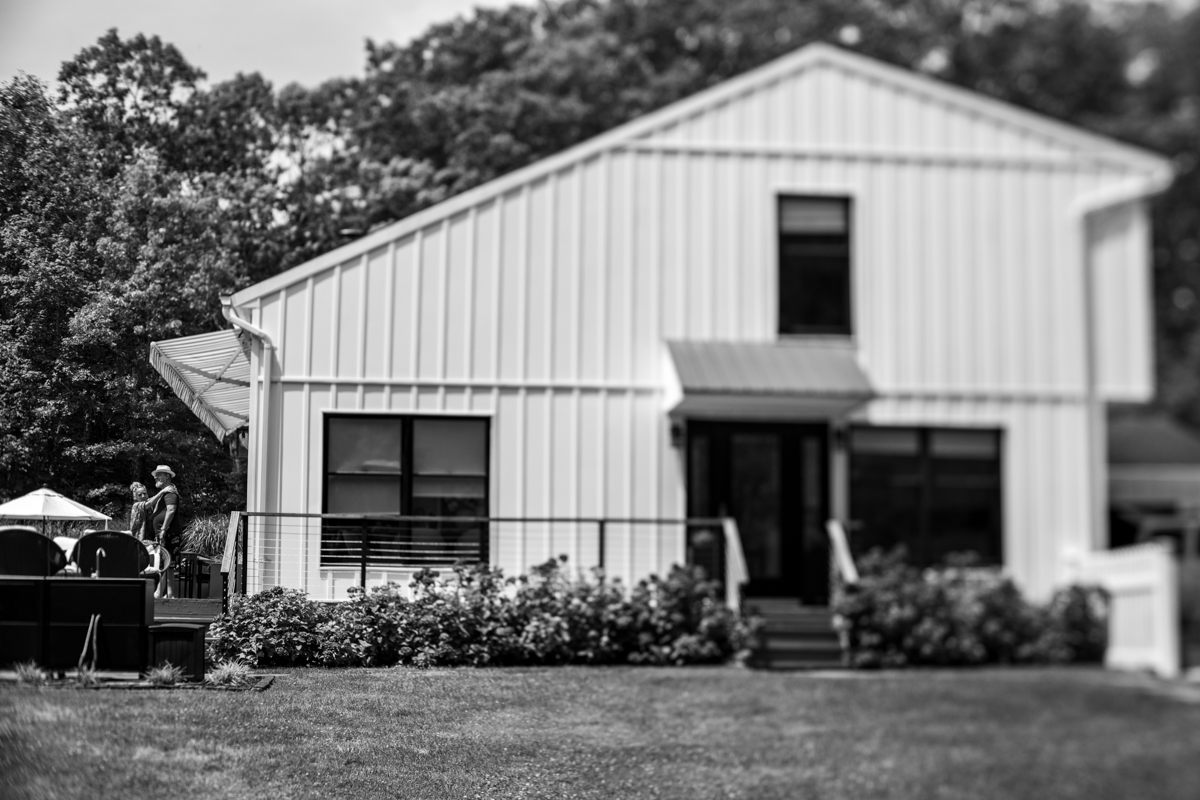
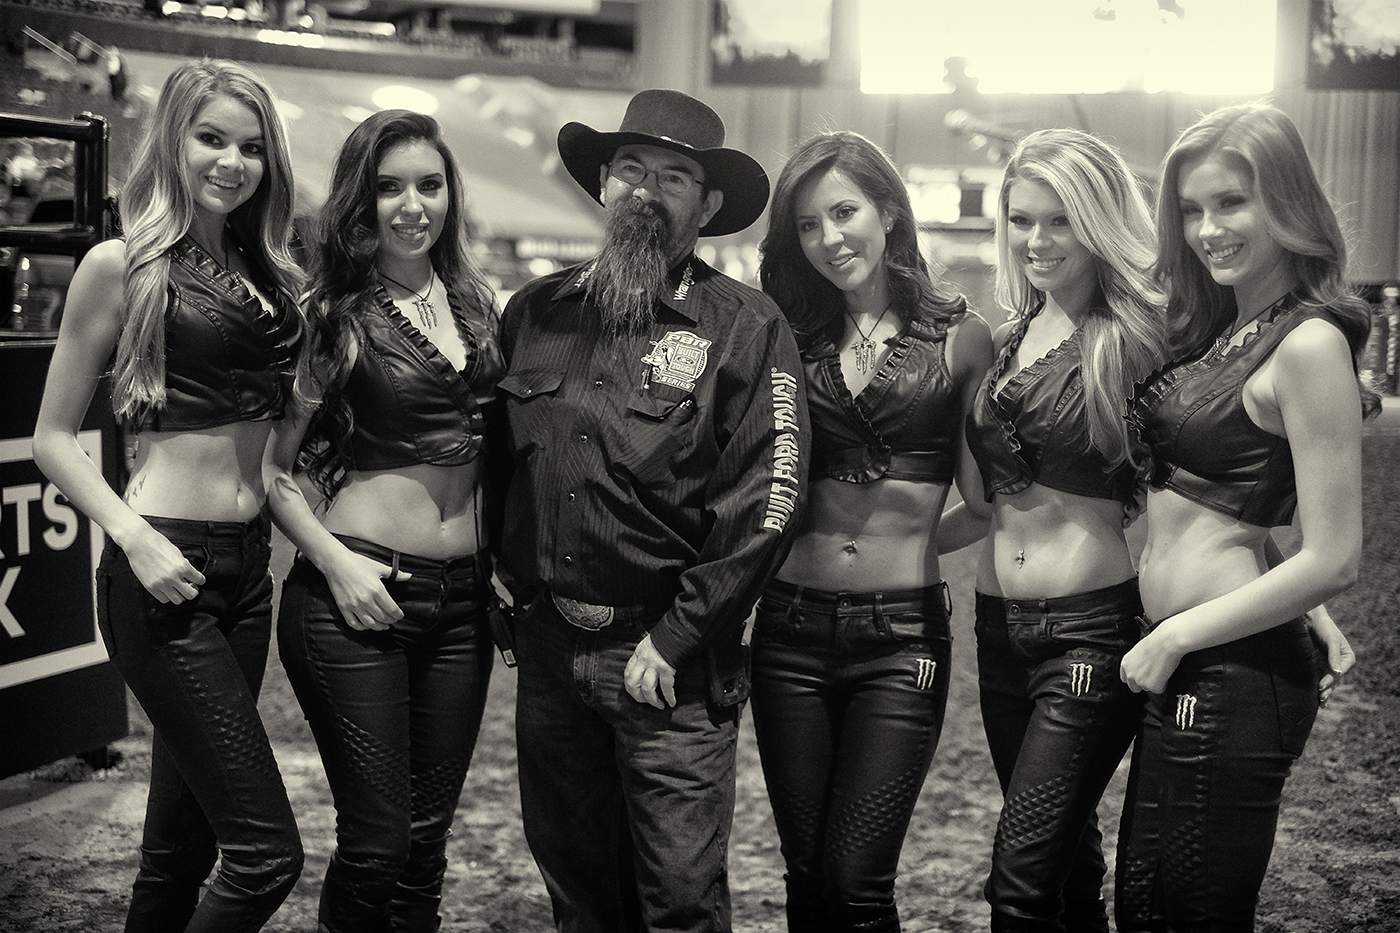
That’s the great night photographer Gabriel Biderman and the president of the Duran Duran fan club, Nancy (only kidding, Nan is one of the finest people I call a friend). But in all seriousness, this image illustrates the way the tilt 50 can assist story telling.

It’s a heavy weight lens at 15.9 oz / 452 g. The focus is smooth as well as the click less aperture ring for those who might consider using it for film making. Which by the way, I suspect would be outstanding. Like a way to shoot a memory or a dream sequence. The lens also has satisfactory knurled rings if you were to use with a follow focus device.

Here’s my plan. I’m keeping the lens. At $229 using a payboo card it has great potential with insignificant investment. In the spring I bought the 14-24 2.8 S lens and love it, but at it’s hefty 2k price it doesn’t do what this little extra nifty fifty can do. It comes in all the mounts including Fuji X, Canon, Sony and micro 4/3. Go buy it at B&H and tell me how you like you it.

~David July 2025

Self Assigned Projects to Cope with Difficulty

Photography is a drug, it can be your savior, a north star in times of trouble. I mean it, when you lift the camera to your eye and view the world through the view finder native troubles are sidelined and creating the image takes center stage. Recently my wife Barbara and I had to drop everything and take care of her aging mother in law in Milan. While we braced for the worst, the little lady has recovered and we are back in NYC.  

The following text is a the narration from the slide show you can view on Youtube.

This family calamity had moments of full attention and lots of down time. Using the down time to mitigate the situation would lend peace and purpose to this dark time. So I did what every self respecting photographer artist would do and make a “creative plan” that is really art therapy. Taking stock of what I had and where I would be I vowed to push myself to its completion. 

Setting parameters. 

Before leaving I took stock in front of my antique breakfront that houses my camera collection. The task ahead was a heavy one, and I wanted to reach deep down chose a camera that is challenging (requiring focus) and inspirational. Recently I swapped out straps on my gorgeous Nikon SP (the rate 2005 reissue) and I was keen to bring it into the field. It had been over a year since I ran a roll of film through the camera and it’s always a pleasure to use, the camera feels so good in the hands. What optics to bring? For Lenses would be a 35mm 1.8 and 25mm f4. Check. I also have a new iPhone 16 Pro Max I had just upgraded from my iPhone 13 so that would be my “mobile sketch book”. Check. Because I am a serious photographer and I have been so successful with my current camera set up, I packed the Nikon Z9 and the super versatile 24-120 f 4. Along with two laptops (my airbook and B&H work laptop) I stuffed it all into a Tenba back pack and along with Eisenhower my faithful Chihuahua I jetted off to Italy.  

We are staying in the Bovisa neighborhood of Milan and there is an old school film lab around the corner from the flat, “Speed Foto” that maintains a nice selection of used analog cameras they display in the window and a great selection of different films. After sorting out important health obligations I eagerly headed over to peruse what vintage cams they had and most importantly, buy a few rolls of film to shoot. I picked to something weird, Lomography “lomochrome” film in a three pack. Each roll has it’s own color funk, turquoise, metropolis, and purple. The process is C41 but I after shooting with them, I surmised they are a slide film (positive) that are maximized for C41 process making them negatives. The formula and process makes odd color shifts in different spectrums. The results are weird as you can see from the below work. 

I resolved to finish those rolls in the 12 days between flights. I felt the first roll was getting into form and getting used to the camera which is requires lots of work for urban street photography. The camera is fully manual exposure and focus. Due to its compact size, changing aperture is difficult and the view finder for these old eyes is challenging. I brought shoe mount meter, but the on switch stayed on during the flight and the button battery was dead. I resolved to go meter less and use my years of intuition to guess the exposure. A few days in I wanted to see how accurate I was and downloaded the Lux app on the iPhone. 9 times out ten I nailed it. 

The above parameters made for a very exciting photography distraction. I got to make some work, challenge my skills and focus on photography in a total way. I have a new found appreciation for how good the modern Nikon Z series cameras are. The Nikon S rangefinder system is 1950’s, my Z9 and Zf are post covid tech- 2022, a whopping 70 years of photography progress! It shows in every aspect, but I have a saying, “you have to know where you came from to know where you’re going”. The mini project fulfilled that in a profound way. I’m also happy to report that Mom is recovered and doing well. She has a bionic enhancement of a pacemaker, but her body is 1930’s. She’s like the Nikon SP and Nikon Z9 combined!

Reinvigorate with Drone Photography and Fly Like an Eagle

Lago Trasimeno, Italy.

I purchased my first drone in 2018, the original DJI Mavic Air in red. I had a co-worker at B&H show me the ropes and then took the drone to Italy. For the first few flights my hands were shaking like a hound dog passing peach pits! It was truly exciting to take a camera into the sky and then apply years of early video game training to fly it over a mile away- so far that I quickly would lose sight of the little red drone.

Castello di Montecchio Vesponi, Italy
Small Castle and Olive Grove above Punta Bella, Italy

Aside from fear of crashing I was dumbfounded by the choice of either video or still. When I started droning I leaned heavily into video and even upped my Adobe account to include Premier. I put together a Tuscan countryside video that was quite basic and filled with mistakes. However among those mistakes were gold- I was learning to see like an eagle if not fly like one.

The End- Montauk Light House, NY

Drones can see straight ahead and at any angle completely down. It was the “completely down” that blew me away. Drones are smart, in that they know where they are in space (thank you GPS satellites). They can hover and remain stationary or they can fly upwards of 40 MPH in “sport mode”. What I found most appealing from a photographic perspective is hovering in cinema mode. Cine mode makes the drone move very slowly, like a slow camera pan. In still photography it allows for precise micro adjustments of the composition.

South End of Manhattan with Staten Island Ferry, NYC 2020

So get this, you are controlling a camera in the sky (400 foot ceiling as per FAA) over a mile away and making slight adjustments for framing while using altitude as your zoom. That is very exhilarating and empowering. You are now not limited to the perspective afforded by being grounded. Technology is wonderful!

Hay Rolls in a Tuscan Field
By lowering altitude you can “zoom” in a on detail or rotate to alter the entire composition.

During the pandemic I bought the DJI Mavic Mini and used it on the quiet streets of Manhattan to document the amazing city. The Mini is under 50 grams and no licenses are needed to fly it, so it was perfect for my urban explorations.

Brooklyn Bridge Morning, NYC 2020
Brooklyn Bridge view towards Brooklyn (note the low covid traffic), NYC 2020

I’ve walked past this skate park at least 1000 times but when I viewed it from above I discovered a geometry and texture that remained unseen from the ground.

Chelsea Piers Skate Park, NYC 2021
Lower Altitude with Skaters
300 % Crop of the above photograph

Sometimes great surprises can occur when you are droning that being on the ground would go unnoticed like this message in the corn fields of Warwick NY in the fall of 2020.

Corn Maze, Warwick NY 2020

Much like a view camera, there are a number of steps to ensure you achieve the image you want. Forget one step and you blow you chance or worse, crash the drone. Here is my “Pre-Flight Checklist” to ensure a successful, fruitful flight with the Mavic Air first gen.

Pre-Flight Check List Done in Water Color

The Mavic Mini is my faithful companion in rural italy where I can fly it safely and see a whole new landscape from above. I keep it in Tuscany, and look forward to a new generation of Mavic to purchase soon. Each release of the Mavic series from DJI just gets better and better. I find it thrilling and what’s really amazing is that it represents a whole new way of seeing that is accessible and relatively wide open to anyone who doesn’t have a fear of flying.

Delaware Water Gap, NJ 2021

Stay tuned for Part Two, Droning with Video.

The Ultimate Light for the iPhone- Profoto C1+

PROFOTO C1+ Review

September 18th Profoto released the next big thing, a flash & continuous light designed for iPhone. I was lucky to be invited along with a hand full of NYC photographers by Clifford Pickett for a hands on demonstration and photowalk around the SoHo neighborhood of NYC testing the C1+.

IMG_9C55552F375E-1

It’s a very interesting development for mobile photography and has some unique features that I really enjoyed and thought were well thought out. Like any Profoto product, it is very well made and has a great feel in the hands. Profoto is arguably the best lighting system in the world, and I truly believe that. Aside from all the gear always made in black there is a plethora of facts to support my statement. Profoto light modifiers are hands down the best light modifiers and the C1+ accepts all the mods made for the A series. They attach smartly with magnets and as expected, perform very well. The C1+ ships with a light dome to mimic solar light. You can remove the dome and the light becomes slightly more defined. There is a sturdy 1/4 socket for the light to be attached to a light stand (you’d want a swivel umbrella adaptor to make best use). Clifford tested it with an umbrella and the light was quite nice.

You can’t use the native camera app, you have to download the Profoto app to synch the light for flash photography. (edit: compatible with the huawei native camera app for the P30 series)The app is only available for IOS (iPhone 7 and up), no Android support yet (more proof the apple iPhone is better than android). You could use it in continuous mode with the native app, just not for flash. As expected, the Profoto app is very professional and lets you control exposure, white balance (color temp), zoom and adds a timer. Currently, portrait mode is not supported but the engineers are on it (I simply love portrait mode and can’t wait for that to be supported).

IMG_1353

So as photographers we want control, and below is a series of portraits made of the fellow photographer Claudia Paul on the photowalk. I took a series of photos at different exposures using the “exposure slider” on the app. I posted images from screen shots of the app so you can see the exposure variance.

IMG_1357

This was my favorite, and it has been slightly edited in Snap Seed.


What I really liked was the camera release – shutter release – trigger  on the flash itself, so you can hold your camera in one hand, the flash in the other and shoot very naturally. How many of us have held the camera out, triggered it only to have the camera turn off! Or worse yet, just fumble. I really can’t express how natural it is to use the flash this way, it’s a true evolution of iPhoneography!

The unit comes two ways, the C1 and C1+. C1 is $300 and does not support TTL in the Profoto system. The C1+ is $500, has better battery life and supports the Profoto air remote and can be integrated into the Profoto TTL family of flashes. This is key, any one who has a Profoto system will enjoy being able to put this light where other lights can’t go. Think behind a shelf, a couch, a small corner… the applications are endless. When I was a young photographer I recall an older photographer training me on a wedding and he produced a cheap small flash with a synch on it, and called it a “peep” flash, it was used where we couldn’t fit the big flashes and it provided just a little bit of fill flash where needed in tight areas.

IMG_1354

Characters on the streets of NYC! Notice the catch light in his eyes and emphasis on the gold teeth. With out a light this would be a much duller photograph.

Now it’s not really a flash as we know it, there is no manual and no high synch flash. It has limitations because it’s a manual simulation to bias to the automatic limitation of mobile photography. You can’t lock in an exposure. I did find exposure to be slightly erratic. I’m trained in zone system and chrome shooting, so I found that disconcerting, but it’s really ok, because it’s still iPhone and the spirit is wonky to start with. You can’t freeze fast moving subjects like with a traditional flash. Recycle time is about 1 second or so.

IMG_9DFB78219AD0-1

Steve Simon’s son came along, after this shot, I warned him to keep his tongue in his mouth when in NYC. #germs #cutekids #scaryphoto

Here are three images to illustrate how it helps with back lit subjects.  The image on the left is adjusted with the slider in the native iPhone app, the middle with no adjustment , and the right image with the C1+ providing fill light.


Overall I think this light is a game changer, and as the app continues development it will be clutch as a tool for the iPhone photographer to keep in their pocket. It takes some getting used to, but once you master the usage and interface, it’s a wonderful tool to enhance your iPhone work.

The truly best part of the photowalk? We got to keep the flashes! Thanks Profoto, I look forward to using this with my iPhone work in the future.

~David


Bull Riding in NYC

ride3

I got a last minute invitation today to photograph the third and last day of PBR- Professional Bull Riding event at Madison Square Garden. Armed with my new Fujifilm XPro2 camera I hightailed it over to meet with long time friend and fellow photographer whose gig it was to shoot for Load It, an international trade magazine for productions. I hate to say this, but I think I have known photographer Todd Kaplan for very close to 3 decades. He’s a tried and true working pro- always gets the shot. Shoots with Canon. Good guy.

bullportrait

I heard we would have access, so I imagined cowboys in dressing rooms, ready to test their mettle on the backs of beasts. I grabbed the 18mm and 35 mm lenses in eager anticipation. I should have known how crummy the sodium vapor lights at the Garden are.

monster-girls

The Monster girls posing with their boss. At least he said he was their boss…

The cowboys were getting “in the zone” so no portraits of them occurred, I figured to make the most of the it and test out that new and improved AF system on the XPro2. I switched to high speed mode, AF servo and activated all focus points in with a wide AF center box. Ready to go!

ride2

Auto Focus Mode tracked the action no problem!

I’m usually an aperture priority kind a guy, but for this, I put the lens in A mode and set the camera to 1000 sec shutter speed. I opened up the auto ISO to a 12,500 cap. These settings worked like a charm!

ride5

8 frames per second and 1000th of second shutter nails the shot like the photographer was born in the bull pen. He wasn’t.

I shot these in the Film Sim mode using Across Green Filter setting. I figured the green would un-harsh the crappy stadium type lighting in B&W. My quick edit had me using the good old reliable Nik Silver EFX. I used the #22 ambrotype toning. I figured a warm look matched the classic bull riding theme of the photo shoot.

ride1

The bulls are the real stars.

Here is Todd working, it’s a tough job, someone has to do it.

todworking

bullincorral

MSG back stage, things are a little weird.

msgpbr

I finally found the picture I wanted, this cowboy was from Colorado, but has recently moved to Missouri. He works for 3 1/2 months, then gets to go home for a few weeks. He was cordial and really interested in the people he meets on the road. A gentleman. A gentleman cowboy.

cowboy

The last thing I’d like to convey, there were protesters outside of MSG. The crew I worked with Todd shooting were very professional and the cowboys taking care of the bulls were very respectful of the bulls. I saw no mistreatment and the bulls appeared to be .. well… bullish.

XPro 2 for sports? Yes!

~David

XPro2 First Thoughts and Review

Processed with Snapseed.

Fujifilm XPro2, 35 mm 1.4 lens, Cub Leather Strap, John Varvatos T-Shirt.

I just took delivery of the Fujifilm XPro2 and it will surely be replacing my beloved XPro1 as my primary camera. I’m quite thrilled, and since I’m old school, I like to hang onto photo gear and not get caught up in the great gear race of the latest. I mean, great photographers have been taking great photographs for over a 170 years now, how bourgeois to think that only the latest camera will make you shoot better!

Processed with Snapseed.

NYC High Line Rain. 18mm f 2.0 processed in Snapseed on iPhone.

On a rainy and cold Christmas Eve morning in NYC I took a stroll on the High Line with one of my favorite lenses, the 18mm f2.0. Before I left the warmth of my apartment, I did what I always recommend, take the manual along with cup of hot joe in one hand, and the camera in the other hand. Run page per page through the manual. There was a host of new features and a slight update on the menu system. I downloaded the Fujifilm Remote App and installed on my phone and tablet. The weather was totally miserable, and the normally very busy Highline empty. In a word, Perfect.

img_4459

Close up wide open on the Highline.

First thoughts are hallelujah I finally have a camera with a dependable wifi so I can use my iPhone and post the hyper quality image I get from a “real” camera as opposed to the super ease of iPhoneagraphy (which I love but makes me feel cheap and dirty). I was never able to have any success with Sony’s Memory App but Fujifilm delivers a pretty intuitive and easy app for controlling the camera and managing files transmitted to mobile devices. Note that when you transfer a file via wife to a mobile device, it sends a 3 mp file. On your cards are the big files. This blog post is comprised of only images downloaded to my phone, then airdropped to my MacBook for creating the blog post.

Processed with Snapseed.

Evidently New Yorkers are not ready to have Donald Trump as their next president. Wide open 18mm f2.0 and processed in Snapseed.

Down and Dirty on The Xpro2 from an Xpro1 User

 if you are here just for the pix, you might want to scroll past this part. 

I don’t want to cover what other camera bloggers have written, this camera has been out for a few months and admittedly, I’m late to the game. I’ll add that yes, the focus joystick is the absolute bomb. We all love to play with shallow depth of field, and this is an effortless way ensure that the focus point is exactly where you want it.

I noticed other things such as the now built in diopter and not the annoying Nikon style rubber eye cup. It’s hard to believe the XPro1 didn’t have a built in diopter now that I think about it. That’s a throwback to old school that I could live with out and a welcome feature on Xpro2.

I’m not sure how this is going to help, but when in OVF if you push the OVF/EVF arm towards the lens, a little magnified EVF window pops up in the lower right hand side of the viewfinder. I hit it by accident and had a devil of time figuring out how to remove the little pop up window (the lever now goes in both direcitons). I look forward to figuring out how to leverage that feature.

If you want your Xpro2 to be all it was born to be (LOTR reference) make sure you go into power setting and switch on “Performance Mode”. Thanks Big B Brandon for that tip. The factory default is a middle setting. Performance mode helps focusing by engaging phase detection. I have learned to live with the fact that the XPro platform is a battery hog and just roll with extra batteries. Seems that the XPro2 is the pig that  the XPro1 was. Well what ever we are used to that, if you have a problem keeping batteries charged and on deck, then I suggest you go look at Leica M camera.

The Exposure Compensation Dial has more tension than the XPro1 did, so a casual brush up agains your gut doesn’t result in a +2 exposure mistake you notice later. My first thought was a locking button on the dial would be great, but the tension is just right and a lock is not necessary. Somebody at Fuji was listening.

More Buttons and dials! Yup, pretty much you gain joystick, dials and buttons to customize any which way. The dials push in, turn and simply add tons of customization. I’m fortunate have video game training so my fingers can dance across the camera and do exactly what I want. Well.. almost what I want. I’d love to be able to assign the Fn button to activate the wife transfer instead of going through the menu.

The Grip (which I feel is essential if your hands are larger than Trumps) now has a hole to be able to change the battery (yea we do that a lot) and not have to go through the rigamarole of removing the grip as with the XPro1. The grip also has a machined arca-style QR built into it. #lovethat. Memory card slots (yup, now two of them) are accessed in the side of the camera as opposed to next to the battery. Two slots may entice me to shoot raw when I shoot Jpeg. Pretty cool update and modernization.

In short, if you are a XPro1 user, run, don’t walk to B&H and buy this camera now. Click here for the goodness.

img_4460

The next four years are going to be great for art, oppression has that effect. Glad I had the 18mm, to get this shot I was pressed agains the opposite wall. Wide Saves Lives.

I’m excited the focus system is now really snappy and accurate. I appreciate that, since I like to shoot wide open and have limited depth of field. I need to nail that focus! And the XPro2 delivers.

I did an unboxing video. It’s funny because Elvira (my dear mother in law) helps out. Check it and please, subscribe to my youtube channel)

img_4454

Happy Holidays and let’s toast to no matter what camera you have, make some most excellent photographs!

~David


Ed Brommer & Bradley Beach in Film

This year I decided that I wanted to continue my work photographing Day of the Dead in Mexico. I had first visited and photographed the holiday in 2013. I used the Fujifilm Xpro1 and have a blog post of the work you can find here. I was quite pleased with the work, but had been recently influenced by Rodney Smith and Paul Caponigro to shoot film. I hadn’t shot with my Hasselblad 501 in years, so I thought this would be a good reemergence as such.

I decided to test it out and see about how I would pack it. I’m extremely retentive when it comes to packing for travel. It’s the back packer in me. I first grabbed the Think Tank Speed Racer bag that is preferred by National Geographic field photographers. They know something about travel right?

I packed a Hassy 501 with 50 f4, 80 2.8, 150 F 4 Zeiss glass. One 120 back and a roll of Tri-X to photograph two subjects, my Father and Bradley Beach.

My father is 91 and is a survivor. He outlived all his friends, co-workers, siblings (and their husbands) and one wife. Ed loves his cars. He picks them out carefully, and all through my life, he had cool cars. I asked him to stand in beautiful light in his garage, with his latest prize, a loaded Buick LaCrosse. He had the vanity plate since the 80’s. I gave him the Seahawks sweat shirt back in ’94. He still wears it.

edbrommer

Ed Brommer in his garage, fall 2016 New Jersey

I used the 80 mm 2.8 Distagon with Tri-X rated at 320. Meter reading was taken below Dad’s chin. 250th of a second f 4.0. Cha-Click-Unk.

I spent my summers in Bradley Beach as little kid in the 1970’s. It had a great influence on me, and when i return to Bradley I always get a tear or two in my eye from the sweet memories. This snapshot is the fountain on the board walk at LaReine and Ocean Avenue. All my life, I have seen this classic Jersey Shore fountain.

bradleybeach

Fountain, Bradley Beach, New Jersey.

I enjoyed making these images but what I learned was that the kit would be way too heavy. The Speed Racer bag is made for DSLR with a long zoom lens, while I could pack it nicely, the weight of that glass, especially the 50 and 150 was just prohibitive. The second problem I had with the film workflow, was the cost. I dropped off the roll of film to CRC on 22nd Street. They offer three levels of scans, 2.5 mb scans + processing would be $16.00. I know from experience, never ever get the low grade scan. The next was 15 mb for $30.00 per roll. Whoa, way to costly for me.


So I decided to pack my Fujifilm Xpro 1 and a few lightweight easy lenses and roll with that in Mexico. At least I got to make these two cool shots and dust off the Hassy. I still love that sound and dig the grain from the Tri-X.

Work from Day of the Dead 2016 will be posted soon. I took a year off the blog to see if it would change anything. The only thing it did was keep me off the screen and outside more.

~David